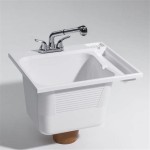
How to Replace and Install a Kitchen Sink
Replacing and installing a new kitchen sink is a relatively straightforward task that can be completed in a few hours. However, it is important to follow the steps carefully to ensure a successful installation.
Step 1: Gather your tools and materials
Before you begin, gather the following tools and materials:
- New kitchen sink
- Sink strainer
- Faucet
- Plumber's putty
- Teflon tape
- Adjustable wrench
- Phillips head screwdriver
- Flat head screwdriver
- Bucket
- Rags
Step 2: Remove the old sink
1. Turn off the water supply to the sink by closing the shut-off valves under the sink. 2. Disconnect the water supply lines from the faucet. 3. Disconnect the drain line from the sink. 4. Remove the mounting clips or screws that are holding the sink in place. 5. Carefully lift the old sink out of the countertop.
Step 3: Prepare the countertop
1. Clean the countertop around the sink opening with a degreaser. 2. Apply a bead of plumber's putty around the edge of the sink opening. 3. Place the new sink in the opening and press down firmly to seat it in the putty. 4. Wipe away any excess putty that squeezes out.
Step 4: Install the faucet
1. Apply a few wraps of Teflon tape to the threads of the faucet shanks. 2. Insert the shanks through the holes in the sink and hand-tighten the mounting nuts. 3. Use an adjustable wrench to further tighten the nuts, but do not overtighten.
Step 5: Connect the water supply lines
1. Apply a few wraps of Teflon tape to the threads of the water supply lines. 2. Connect the lines to the faucet shanks and hand-tighten the nuts. 3. Use an adjustable wrench to further tighten the nuts, but do not overtighten.
Step 6: Connect the drain line
1. Apply a bead of plumber's putty around the base of the sink strainer. 2. Insert the strainer into the drain hole in the sink and hand-tighten the mounting nut. 3. Use an adjustable wrench to further tighten the nut, but do not overtighten.
Step 7: Turn on the water supply and check for leaks
1. Turn on the water supply to the sink and check for any leaks around the faucet, drain, or water supply lines. 2. If there are any leaks, tighten the connections until the leaks stop.
Tips for replacing a kitchen sink
Here are a few tips to help you make the replacement process go smoothly:
- If your new sink is a different size or shape than your old sink, you may need to make some modifications to the countertop. This is best left to a professional.
- Be careful not to overtighten any of the connections, as this can damage the components.
- If you are not comfortable working with plumbing, it is best to hire a professional plumber to install your new sink.

How To Replace And Install An Undermount Sink

How To Replace A Kitchen Sink The Home

Replace A Kitchen Sink Step By Full

How To Remove And Install Kitchen Sink Diy

How To Replace Install A Kitchen Sink Cast Iron Stainless Steel

How To Replace Your Kitchen Sink In 15 Steps

How To Install A Drop In Kitchen Sink

How To Replace Your Old Sink Easy Step By With Photos Vadania Home Upgrader

How To Replace A Kitchen Sink The Home

How To Replace A Tiled In Kitchen Sink Without Damaging Tile


