Replacing A Kitchen Sink Faucet
Replacing a kitchen sink faucet is a relatively simple plumbing repair that can be completed in a few hours. With the right tools and a little bit of know-how, you can save yourself the cost of hiring a plumber. Here's a step-by-step guide to help you replace your kitchen sink faucet:
Step 1: Gather your tools and materials. You will need the following tools and materials to replace your kitchen sink faucet:
- New kitchen sink faucet
- Adjustable wrench
- Basin wrench
- Plumber's putty
- Teflon tape
- Screwdriver
- Bucket
- Rags
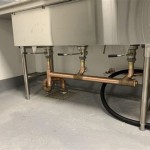
Step 2: Turn off the water supply. Locate the water supply valves under the sink and turn them off. If your sink has a single-handle faucet, there will be two valves, one for hot water and one for cold water. If your sink has a two-handle faucet, there will be four valves.
Step 3: Disconnect the old faucet. Use the adjustable wrench to loosen the nuts that hold the water supply lines to the old faucet. Then, use the basin wrench to loosen the nuts that hold the faucet to the sink. Once the nuts are loose, you can remove the old faucet.
Step 4: Clean the sink surface. Use a damp rag to clean the surface of the sink around the faucet holes. This will help to ensure a good seal for the new faucet.
Step 5: Apply plumber's putty. Roll a small amount of plumber's putty into a snake and place it around the base of the new faucet. This will help to seal the faucet to the sink and prevent leaks.
Step 6: Install the new faucet. Insert the new faucet into the holes in the sink. Tighten the nuts that hold the faucet to the sink by hand. Then, use the basin wrench to tighten the nuts further.
Step 7: Connect the water supply lines. Screw the water supply lines onto the new faucet. Tighten the nuts by hand, then use the adjustable wrench to tighten them further.
Step 8: Turn on the water supply. Slowly turn on the water supply valves under the sink. Check for leaks around the faucet and water supply lines. If you see any leaks, tighten the nuts further.
Step 9: Test the faucet. Turn on the faucet and check for proper water flow. The water should flow smoothly and without any leaks.
Replacing a kitchen sink faucet is a relatively simple plumbing repair that can be completed in a few hours. By following these steps, you can save yourself the cost of hiring a plumber.

How To Replace A Kitchen Sink Faucet Youtube

How To Install A Kitchen Faucet Lowe S

How To Replace A Kitchen Faucet

Replacing An Old Kitchen Sink Faucet With A Modern Pull Down Sprayer

How To Change A Kitchen Faucet Family Handyman

How To Replace A Kitchen Faucet Young House Love

How To Replace A Kitchen Faucet For Newbies Anika S Diy Life

How To Install A Kitchen Faucet The Home

How To Install A Kitchen Faucet The Home

How To Replace A Kitchen Faucet