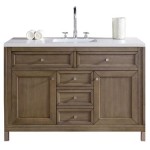
How To Caulk Around A Sink
Caulking around a sink is a relatively easy task that can be completed in a few simple steps. By following these steps, you can ensure that your sink is properly sealed and protected from water damage.
Materials You Will Need:
- Caulk gun
- Caulk
- Caulk finishing tool
- Utility knife
- Rags
- Rubbing alcohol
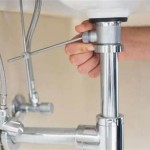
Step 1: Prepare the Surface
The first step is to prepare the surface around the sink. This involves cleaning the area with rubbing alcohol to remove any dirt or debris. Once the surface is clean, use a utility knife to remove any old caulk. Be careful not to damage the sink or countertop.
Step 2: Apply the Caulk
Once the surface is prepared, you can begin applying the caulk. Load the caulk gun with a tube of caulk and cut the tip of the tube at a 45-degree angle. Hold the caulk gun at a 45-degree angle to the surface and apply a bead of caulk around the sink. Be sure to apply the caulk evenly and smoothly.
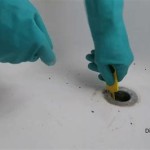
Step 3: Smooth the Caulk
Once the caulk has been applied, use a caulk finishing tool to smooth the caulk. This will help to ensure that the caulk is evenly distributed and that there are no gaps or air bubbles. You can also use your finger to smooth the caulk, but be sure to wear gloves to avoid getting caulk on your hands.
Step 4: Remove Excess Caulk
Once the caulk has been smoothed, use a damp rag to remove any excess caulk. Be sure to wipe the rag in one direction to avoid smearing the caulk. You can also use a utility knife to carefully remove any excess caulk.
Step 5: Allow the Caulk to Dry
Once the excess caulk has been removed, allow the caulk to dry completely. The drying time will vary depending on the type of caulk that you are using. Be sure to read the manufacturer's instructions for specific drying times.
Tips for Caulking Around a Sink:
- Use a high-quality caulk that is specifically designed for use in kitchens and bathrooms.
- Apply the caulk in a continuous bead and avoid overlapping the caulk.
- Smooth the caulk immediately after applying it to prevent it from drying prematurely.
- Remove any excess caulk as soon as possible to avoid it hardening and becoming difficult to remove.
- Allow the caulk to dry completely before using the sink.
By following these tips, you can ensure that your sink is properly sealed and protected from water damage.

How To Re Caulk A Sink

How To Caulk The Kitchen Sink With Pictures Wikihow

How To Re Caulk A Bathroom Sink Ifixit Repair Guide

How To Caulk A Bathroom Sink 12 Steps With Pictures Wikihow

Diy Remove Caulk And Replace In Kitchen Sink Dap Global

How To Caulk Bathroom Surfaces The Inspector Blog

How To Caulk The Kitchen Sink With Pictures Wikihow

How To Caulk A Kitchen Sink Waypoint Inspection

How To Re Caulk A Bathroom Sink Ifixit Repair Guide

Easy How To Replace The Silicone On An Undercounter Sink