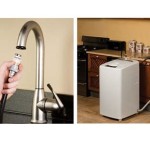
Kitchen Sink Faucet Handle Replacement
A leaky or damaged kitchen sink faucet handle can be a major inconvenience. Fortunately, it's a relatively simple repair that most homeowners can tackle themselves with a few basic tools.
Here's a step-by-step guide to replacing a kitchen sink faucet handle:
1. Gather Your Tools and Materials
Before you start, you'll need to gather the following tools and materials:
- Adjustable wrench
- Allen wrench or hex key
- Phillips screwdriver
- Flathead screwdriver
- New faucet handle
2. Turn Off the Water Supply
Before you start working on the faucet, it's important to turn off the water supply. This will prevent water from leaking out while you're working.
To turn off the water supply, locate the shut-off valves under the sink. Turn the valves clockwise to shut off the water.
3. Remove the Old Handle
Once the water supply is turned off, you can remove the old faucet handle. Most faucet handles are held in place by a screw or Allen bolt.
To remove a handle with a screw:
- Use a Phillips screwdriver to remove the screw at the base of the handle.
- Once the screw is removed, the handle should come off easily.
To remove a handle with an Allen bolt:
- Use an Allen wrench or hex key to loosen the bolt at the base of the handle.
- Once the bolt is loosened, the handle should come off easily.
4. Inspect the Handle Assembly
Once the old handle is removed, take a moment to inspect the handle assembly. Look for any signs of damage or wear that may have caused the handle to break.
If you find any damage, you may need to replace the entire handle assembly. However, if the handle assembly is in good condition, you can simply replace the handle.
5. Install the New Handle
To install the new handle, simply reverse the steps you used to remove the old handle.
To install a handle with a screw:
- Align the new handle with the handle assembly.
- Insert the screw into the hole at the base of the handle.
- Use a Phillips screwdriver to tighten the screw.
To install a handle with an Allen bolt:
- Align the new handle with the handle assembly.
- Insert the Allen bolt into the hole at the base of the handle.
- Use an Allen wrench or hex key to tighten the bolt.
6. Turn on the Water Supply
Once the new handle is installed, turn on the water supply and check for leaks.
If you find any leaks, tighten the packing nut around the handle assembly.
7. Adjust the Handle
Once the handle is installed and there are no leaks, you can adjust the handle to your desired position.
To adjust the handle, simply loosen the set screw on the handle assembly and move the handle to the desired position.
Once the handle is in the desired position, tighten the set screw to secure it.

How To Fix A Faucet Tighten Kitchen Sink Handle

Stainless Moen Kitchen Faucet Handle Replacement Ifixit Repair Guide

Parts And Service Kits Moen

Tighten Loose Faucet Handle And Base Moen Kitchen Bathroom

Bathroom Accessories Two Functions Pull Out Down Kitchen Sink Faucet Sprayer Head Replacement Shower

2 Functions Pull Out Down Kitchen Sink Faucet Replacement Parts Sprayer Head Shower Attachment Bathroom Furniture Accessories Made In China Com

Brass Single Handle Deck Mounted Chrome Plated Long Medical Lever Kitchen Sink Faucet For Hospital Faucets Replacement Cost Made In China Com

19 Styles Available Tap Handles Replacement Kitchen Bathroom Sink Faucet Handle

Archive How To Keep Kitchen Faucet Rotating Smoothly

Chrome Finished Tional Brass Body Zinc Alloy Handle Whole Hotel Kitchen Faucet Sink Faucets Replacement Cost Made In China Com