How To Change A Kitchen Sink
Changing a kitchen sink, while seemingly daunting, is a manageable project for a homeowner comfortable with basic plumbing and carpentry skills. This article provides a comprehensive guide on the process, covering preparation, removal of the old sink, installation of the new sink, and necessary plumbing connections. Prior to commencing any work, it is paramount to prioritize safety and ensure proper permits are obtained if required by local building codes.
The successful replacement of a kitchen sink hinges on thorough preparation. Gathering the necessary tools and materials beforehand minimizes disruption and ensures a smoother installation process. It also avoids costly trips to the hardware store mid-project. A clear and organized workspace is also critical for efficiency and safety.
Key Stage 1: Preparation is Paramount
The initial step involves gathering the necessary tools and materials. A pipe wrench is essential for loosening and tightening plumbing connections. Adjustable wrenches of various sizes are also needed for general plumbing tasks. A basin wrench, specifically designed for working in tight spaces under the sink, is particularly helpful for disconnecting the faucet and drain assembly.
Plumbing pliers, often referred to as channel locks, are useful for gripping and manipulating pipes and fittings. A screwdriver set, including both Phillips head and flathead drivers, is required for various fastening tasks. A utility knife or a putty knife is needed for separating the old sink from the countertop, along with a scraper for removing old caulk or sealant.
Safety glasses are mandatory to protect the eyes from debris. Work gloves safeguard the hands from sharp edges and potential contaminants. A bucket is necessary for catching water during disconnection of the plumbing. A sponge and towels are essential for cleaning up spills and drying surfaces.
In terms of materials, the new kitchen sink is, of course, the primary requirement. Plumber's putty is crucial for creating watertight seals around the drain components. Silicone caulk, specifically designed for kitchen and bath applications, is needed for sealing the sink to the countertop. New supply lines for hot and cold water are recommended to ensure reliable connections and prevent leaks. Optionally, new drain pipes and fittings can also be considered for a complete overhaul of the plumbing system.
Before beginning the physical work, it is imperative to shut off the water supply to the kitchen sink. Locate the shutoff valves under the sink for both hot and cold water lines. Turn these valves clockwise until they are fully closed. It is advisable to test the valves by turning on the faucet briefly to confirm that the water flow has stopped completely.
Following water shutoff, disconnect the garbage disposal, if present. Unplug the disposal from the electrical outlet. With the disposal safely disconnected, detach it from the sink's drain flange by loosening the mounting assembly. Position the bucket underneath to catch any residual water.
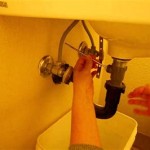
The next step involves disconnecting the drain pipes. Using a pipe wrench or adjustable wrench, loosen the slip nuts connecting the drain pipes to the sink's drain tailpiece and the P-trap. Carefully detach the drain pipes, allowing any remaining water to drain into the bucket. Clean the area around the old sink thoroughly, removing any loose debris or dirt. This will provide a clean surface for inspection and subsequent installation of the new sink.
Key Stage 2: Removal of the Old Sink
The process of removing the old sink varies depending on how it is attached to the countertop. Many sinks are held in place by clips or brackets installed from underneath the countertop. Accessing these clips often requires lying on one's back inside the cabinet, potentially in a confined space. If clips are present, they must be unscrewed or loosened to release the sink.
Another common method of attachment involves adhesive caulk or sealant around the perimeter of the sink. Carefully use a utility knife or putty knife to score through the caulk line, separating the sink from the countertop. Work slowly and methodically around the entire perimeter to ensure a clean break. Be prepared for some resistance, especially if the caulk has been in place for an extended period.
With the clips loosened and the caulk line severed, the sink should be free to lift out. If the sink is particularly heavy or difficult to maneuver, it may be necessary to have assistance. Gently lift the sink upwards and outwards, taking care not to damage the countertop. Once the old sink is removed, thoroughly clean the countertop surface. Remove any remaining caulk, sealant, or adhesive using a scraper or putty knife. A solvent may be necessary to remove stubborn residue.
Inspect the countertop for any damage, such as cracks, chips, or water stains. Address any necessary repairs before proceeding with the installation of the new sink. If the countertop is significantly damaged, it may be necessary to replace it entirely before installing the new sink.
Key Stage 3: Installing the New Sink
Before installing the new sink, it is crucial to prepare it according to the manufacturer's instructions. This may involve attaching the faucet and drain assembly to the sink bowl. Apply plumber's putty around the drain opening on the underside of the sink. Insert the drain flange and tighten the locknut from below. Remove any excess putty that squeezes out.
Install the faucet according to the manufacturer's instructions. This typically involves attaching the faucet base to the sink and connecting the water supply lines. Ensure that all connections are tight and secure to prevent leaks. Some faucets may require additional sealant or plumber's tape to ensure a watertight seal.
Position the new sink over the countertop opening. Ensure that it is properly aligned and centered. If the sink comes with mounting clips, attach them to the sink and position them under the countertop. Tighten the clips to secure the sink in place. Apply a bead of silicone caulk around the perimeter of the sink where it meets the countertop. This will create a watertight seal and prevent water from seeping underneath the sink.
Smooth the caulk line with a finger or a caulk smoothing tool. Remove any excess caulk with a damp cloth. Allow the caulk to cure according to the manufacturer's instructions before using the sink. Once the sink is securely installed, reconnect the plumbing. Attach the drain pipes to the sink's drain tailpiece and the P-trap. Tighten the slip nuts securely, ensuring that all connections are watertight.
Connect the hot and cold water supply lines to the faucet. Use new supply lines to ensure reliable connections and prevent leaks. Tighten the connections with adjustable wrenches, taking care not to overtighten and damage the fittings. If a garbage disposal is being reinstalled, attach it to the sink's drain flange, reversing the removal process. Ensure that the disposal is properly aligned and securely mounted.
Turn the water supply back on slowly and check for leaks. Inspect all connections carefully for any signs of water leakage. If leaks are detected, tighten the connections further or replace any faulty components. Run water in the sink to test the drain system. Check for leaks around the drain connections and the P-trap. If leaks persist, disassemble the connections and reapply plumber's putty or sealant as needed.
With the plumbing connections completed and tested, the final step involves cleaning the area around the sink. Remove any tools, materials, or debris. Wipe down the countertop and the sink with a damp cloth. Allow the sink to dry completely before using it. Properly dispose of any old plumbing parts, caulk tubes, or other waste materials. The replaced kitchen sink should now be fully functional. Regular cleaning and maintenance will ensure its longevity and continued performance.

How To Replace A Kitchen Sink The Home

Upgrade Your Kitchen Sink Diy Replacement

How To Change Kitchen Sink Tapron Uk

How To Upgrade Your Kitchen Sink At Home With Ashley

How To Replace A Kitchen Sink The Home

How To Replace The Kitchen Sink Plumber Sydney

How To Replace Your Old Sink Easy Step By With Photos Vadania Home Upgrader

How To Upgrade Your Kitchen Sink It S Easier Than You Think

How To Upgrade Your Kitchen Sink At Home With Ashley

How To Install A Drop In Kitchen Sink


