How to Fix a Leaky Sink Trap
A leaky sink trap is a common household plumbing issue that, while often appearing daunting, can frequently be resolved with a few basic tools and a systematic approach. The sink trap, typically a U-shaped or P-shaped pipe located beneath the sink basin, serves the crucial function of trapping debris and preventing sewer gases from entering the home. Leaks in this area can result in unpleasant odors, water damage, and potentially unsanitary conditions. Identifying the location and cause of the leak is the first step in the repair process. This article provides a detailed, step-by-step guide to troubleshooting and fixing a leaky sink trap.
Before initiating any repair work, it is essential to gather the necessary tools and materials. These generally include: channel-lock pliers (also known as adjustable pliers), a pipe wrench, a bucket or container to catch water, plumber's putty, Teflon tape (plumber's tape), a screwdriver (both Phillips and flathead may be needed), old rags or towels, and replacement parts if necessary (such as new washers, slip nuts, or even sections of pipe). Safety is paramount; therefore, wearing gloves is advisable to protect hands from grime and potential bacteria. Eye protection is also recommended, especially when dealing with older, corroded pipes that may release debris when disturbed.
Key Point 1: Identifying the Source of the Leak
Pinpointing the exact location of the leak is crucial for an effective repair. Often, the leak will be readily apparent due to dripping water or visible signs of water damage. However, in some cases, the leak may be slow and subtle, requiring a more thorough inspection. Begin by carefully examining all connections of the sink trap. These include the points where the trap connects to the tailpiece (the pipe extending directly from the sink drain), where the U-bend connects to the waste arm (the pipe that extends into the wall), and the joints within the trap itself, particularly if it is a multi-piece trap.
Run water into the sink and observe each connection point for any signs of leakage. Use a dry rag or paper towel to wipe each joint dry and then check to see if moisture reappears. This can help isolate the specific location of the leak. Pay close attention to areas where slip nuts are used, as these are common points of failure. Check for cracks or damage in the pipes themselves. Corrosion, especially in older metal traps, can weaken the pipe and lead to leaks. If the pipes are severely corroded, replacement of the entire trap may be necessary.
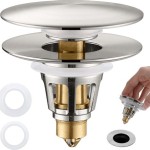
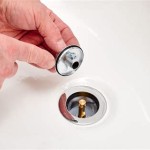
If the leak appears to be originating from the sink drain itself (where the tailpiece connects to the sink basin), the issue may not be with the trap, but rather with the drain flange or the plumber's putty used to seal it. This will necessitate a different repair procedure, involving removing the drain flange and reapplying fresh plumber's putty. However, this article primarily focuses on addressing leaks within the sink trap assembly itself.
Key Point 2: Tightening Connections and Replacing Washers
Once the source of the leak has been identified, the next step is to attempt to tighten the connections. This is often the simplest and most effective solution for minor leaks. Use channel-lock pliers or a pipe wrench to carefully tighten the slip nuts that secure the trap components. Be cautious not to overtighten the nuts, as this can damage the plastic or metal and potentially exacerbate the leak. Tighten the nuts incrementally, checking for improvement after each adjustment. If the leak persists after tightening, proceed to the next step.
If tightening the connections does not resolve the leak, the problem may be with the washers located inside the slip nut connections. These washers provide a watertight seal and can deteriorate over time due to age, exposure to chemicals, and constant pressure. To replace the washers, first place a bucket or container under the sink trap to catch any remaining water. Carefully loosen the slip nuts using channel-lock pliers. Disconnect the trap components, paying attention to the order and orientation of the washers.
Examine the washers for signs of wear, cracking, or deformation. Replace the old washers with new ones of the same size and type. Washers are typically made of rubber or plastic and are readily available at most hardware stores. Ensure that the new washers are properly seated in the slip nut connections before reassembling the trap. Once the trap is reassembled, tighten the slip nuts securely, but avoid overtightening. Run water into the sink and check for leaks. If the leak persists after replacing the washers, the problem may be with the trap components themselves.
Key Point 3: Repairing or Replacing Damaged Trap Components
If tightening connections and replacing washers fails to stop the leak, the next step is to inspect the trap components for damage. Cracks, holes, or severe corrosion in the pipes can all cause leaks. If a small crack is found in a PVC pipe, a temporary repair can sometimes be made using epoxy putty or waterproof tape. However, this is not a permanent solution and the damaged pipe should be replaced as soon as possible.
For more significant damage or corrosion, replacing the affected trap component is the best course of action. Individual components of the sink trap, such as the U-bend, waste arm, or tailpiece, can typically be purchased separately at hardware stores. Before purchasing a replacement part, carefully measure the diameter and length of the existing component to ensure a proper fit. Take the old part with you to the store for comparison if possible.
When replacing a trap component, disconnect the old part from the rest of the trap assembly. Clean the threads of the connecting pipes with a wire brush to remove any debris or corrosion. Apply Teflon tape to the threads of the connecting pipes to create a watertight seal. Wrap the Teflon tape around the threads in a clockwise direction, overlapping each layer slightly. Reassemble the trap using the new component, tightening the slip nuts securely. Run water into the sink and check for leaks. If the leak persists, double-check all connections and ensure that the washers are properly seated.
In cases of severe corrosion or extensive damage to multiple trap components, replacing the entire sink trap assembly may be the most practical and cost-effective solution. Complete sink trap kits are readily available at hardware stores and typically include all the necessary components for a straightforward installation. When installing a new sink trap, follow the manufacturer's instructions carefully to ensure proper assembly and a watertight seal.
If the sink trap is made of metal (such as copper or brass) and is leaking due to corrosion, attempting to repair it may be more difficult and less reliable than replacing it. Metal traps are more prone to corrosion than PVC traps, especially in areas with hard water. Cutting and soldering metal pipes requires specialized tools and skills and is best left to a professional plumber. In most cases, replacing a metal sink trap with a new PVC trap is a more practical and cost-effective solution.
When working with plumbing connections, it is always important to exercise caution and avoid excessive force. Overtightening nuts or connections can damage the pipes or fittings and create new leaks. If you are unsure about any aspect of the repair process, it is always best to consult a qualified plumber. A professional plumber has the experience and expertise to diagnose and repair plumbing problems quickly and efficiently, minimizing the risk of further damage or complications. Furthermore, local plumbing codes may dictate specific requirements for plumbing repairs, and a licensed plumber will be familiar with these regulations.
After completing the repair, thoroughly clean the area under the sink to remove any spilled water or debris. Check for any signs of residual moisture or leaks in the days following the repair. If the leak reappears, double-check all connections and consider seeking professional assistance. Regular inspection of the sink trap and other plumbing fixtures can help identify potential problems early, preventing more serious and costly repairs in the future.
Proper maintenance of the sink trap involves avoiding the disposal of grease, hair, and other debris down the drain. These materials can accumulate in the trap, causing clogs and potentially leading to leaks. Regularly flushing the drain with hot water can help prevent the buildup of debris. Additionally, using a strainer or drain screen can catch larger particles and prevent them from entering the trap.

Easy Ways To Fix A Leaky Sink Trap 12 Steps With Pictures

How To Fix Or Replace A Leaky Sink Trap Hometips

Why Is My Kitchen Sink P Trap Leaking At Connection Nut

How To Repair A Leaking Sink Trap

4 Simple Ways To Fix A Leaky Sink Drain Pipe Wikihow

Leaky Sink Basket Strainer How To Fix The Most Common Leak

How To Fix Leak On P Trap

How To Replace A Kitchen Sink Drain Strainer Repair Leak

Quick Tip For A Kitchen Sink Drain That Is Leaking

How To Fix Or Replace A Leaky Sink Trap Hometips