Leaking Pipe Under Bathroom Sink: Identification, Causes, and Solutions
A leaking pipe under a bathroom sink is a common household problem that can lead to water damage, mold growth, and increased water bills if left unaddressed. Identifying the source of the leak promptly and implementing appropriate solutions are crucial for preventing further complications and maintaining a healthy and functional plumbing system. This article provides a comprehensive overview of the causes of leaking pipes under bathroom sinks, methods for identifying the source of the leak, and the steps involved in implementing effective solutions.
Identifying the Source of the Leak
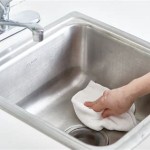
The first step in addressing a leaking pipe is to pinpoint the exact location of the leak. This may involve a thorough visual inspection of all components under the sink, including the supply lines, drainpipes, and connections. Start by drying the area under the sink with a clean cloth or paper towels. This allows for a clearer observation of where the water is actively originating. It's essential to inspect all connections and joints carefully since these are common points of failure.
Specifically, the following components should be examined closely:
- Supply Lines: These flexible or rigid pipes connect the water shut-off valves to the faucet. Check for cracks, pinholes, or corrosion along the length of the lines, as well as leaks at the connections to the valves and the faucet.
- Shut-off Valves: These valves control the water supply to the faucet. Inspect them for leaks around the valve stem (the handle) and at the connections to the supply lines.
- Faucet Tailpiece: This is the pipe that connects the faucet body to the drain assembly. Look for leaks at the connection between the faucet and the tailpiece, as well as along the length of the tailpiece itself.
- P-Trap: This U-shaped pipe is designed to trap debris and prevent sewer gases from entering the bathroom. Inspect the P-trap for cracks, leaks at the joints, and signs of clogs that may be causing backpressure and forcing water to leak.
- Drain Tailpiece: This pipe connects the P-trap to the drain flange in the sink. Check for leaks at the connections to the P-trap and the drain flange.
- Drain Flange: This is the part of the drain assembly that sits inside the sink basin. Look for leaks around the flange and the connection to the drain tailpiece.
If the leak is difficult to locate, running the water in the sink and observing the components while they are in use can help identify the source. Gently wiggling the pipes and connections can also reveal loose fittings. In some cases, a small mirror and a flashlight may be necessary to inspect hard-to-reach areas.
Common Causes of Leaking Pipes
Several factors can contribute to leaks in the plumbing under a bathroom sink. Understanding these common causes can help in identifying the specific problem and implementing the appropriate repair.
Loose Connections: Over time, vibrations, temperature changes, and normal wear and tear can cause connections to loosen. This is a frequent cause of leaks, especially at threaded joints and compression fittings. Simply tightening the connections firmly, but not excessively, can often resolve the issue.
Corroded or Damaged Pipes: Corrosion can weaken pipes, leading to pinholes or cracks that cause leaks. This is more common in older homes with metal piping. Physical damage, such as dents or bends, can also compromise the integrity of the pipes. Corroded or damaged pipes typically require replacement.
Worn-Out Washers and O-Rings: Washers and O-rings are used to create watertight seals at connections. Over time, these components can deteriorate, become brittle, or crack, leading to leaks. Replacing worn-out washers and O-rings is a relatively simple and inexpensive repair.
Improperly Installed Plumbing: Faulty installation practices, such as over-tightening connections or using the wrong type of fittings, can create weak points in the plumbing system that are prone to leaks. Correcting improperly installed plumbing may require redoing the connections according to best practices and manufacturer specifications.
Clogged Drains: A clogged drain can cause water to back up in the sink and put pressure on the pipes, leading to leaks at joints and connections. Clearing the clog can relieve the pressure and stop the leak. Methods for clearing clogs include using a plunger, a drain snake, or a chemical drain cleaner (with caution).
High Water Pressure: Excessively high water pressure can stress the plumbing system and cause leaks at weak points. A pressure regulator can be installed on the main water line to reduce water pressure to a safe level, typically between 40 and 60 psi.
Solutions for Addressing Leaking Pipes
Once the source and cause of the leak have been identified, appropriate repair measures can be taken. The specific solution will depend on the nature and severity of the problem.
Tightening Connections: For leaks caused by loose connections, carefully tighten the fittings with a wrench. Use two wrenches – one to stabilize the pipe and the other to tighten the fitting. Avoid over-tightening, as this can damage the threads or the pipe itself. A slight turn is often enough to create a secure seal. After tightening, turn on the water and check for leaks. If the leak persists, the connection may need to be disassembled, cleaned, and reassembled with new Teflon tape or pipe dope.
Replacing Washers and O-Rings: If a leak is traced to a worn-out washer or O-ring, turn off the water supply to the affected fixture. Disassemble the connection, remove the old washer or O-ring, and replace it with a new one of the correct size and material. Applying a small amount of plumber's grease to the new washer or O-ring can improve the seal and prevent it from drying out. Reassemble the connection and turn the water back on to check for leaks.
Repairing or Replacing Pipes: If a pipe is corroded, damaged, or has a pinhole leak, it may need to be repaired or replaced. Small pinhole leaks can sometimes be temporarily patched with epoxy putty or pipe repair tape, but this is only a short-term solution. For a more permanent repair, the damaged section of pipe should be cut out and replaced with a new section of the same material. This may involve using compression fittings, soldering, or other plumbing techniques. If the damage is extensive, it may be necessary to replace the entire pipe. Before attempting any pipe repairs, ensure the water supply is turned off. Professional assistance should be considered for complex pipe repairs.
Replacing Faucet or Fixture: If the leak originates from a crack in the faucet body or other parts of the fixture, replacing the entire faucet or fixture may be the most effective solution. This involves disconnecting the water supply lines and drainpipes, removing the old faucet or fixture, and installing the new one according to the manufacturer's instructions. Ensure that all connections are secure and watertight.
Clearing Clogged Drains: If a clogged drain is contributing to the leak, clear the clog using a plunger, a drain snake, or a chemical drain cleaner. When using a chemical drain cleaner, follow the manufacturer's instructions carefully and wear appropriate protective gear, as these chemicals can be corrosive. After clearing the clog, flush the drain with hot water to remove any remaining debris.
Applying Plumber's Tape or Pipe Dope: For threaded connections, applying plumber's tape (Teflon tape) or pipe dope (pipe joint compound) can help create a watertight seal. Wrap the threads of the male fitting with Teflon tape in a clockwise direction, overlapping the tape slightly with each revolution. Alternatively, apply a thin coat of pipe dope to the male threads. Reassemble the connection and tighten it securely. Wipe away any excess Teflon tape or pipe dope.
Professional Assistance: While many minor plumbing repairs can be handled by homeowners, more complex issues, such as extensive pipe damage, clogged drain lines, or faulty faucet installations, may require the expertise of a licensed plumber. A professional plumber can accurately diagnose the problem, provide appropriate solutions, and ensure that the repairs are completed to code and with quality workmanship.
By understanding the common causes of leaking pipes under bathroom sinks, identifying the source of the leak, and implementing the appropriate solutions, homeowners can effectively address this common plumbing problem and prevent further damage to their homes. Proactive maintenance, such as regularly checking for leaks and addressing them promptly, can also help to extend the life of the plumbing system and avoid costly repairs.

How To Fix A Leaking Bathroom Sink Paschal Air Plumbing Electric

Common Sink Leaks You Could Probably Fix Yourself

Bathroom Sink Drain Leaking Around Threads Premier Plumbing Inc

How To Fix Constant Leak Under Bathroom Bunnings Work Community

Hose Under Your Sink Is Leaking Here S What You Have To Do

Bathroom Sink Drain Leaking Around Threads Premier Plumbing Inc

Trap Leaking Under Bathroom Vanity Doityourself Com Community Forums

How To Fix Constant Leak Under Bathroom Bunnings Work Community

Leaking Sink Tailpieces Ehow

How To Fix Pipework A Tap Faucet Leaking Under The Sink Youtube

