How to Re-Caulk a Sink
A well-caulked sink is essential for a clean and functional kitchen or bathroom. Caulk seals the gap between the sink and the countertop, preventing water from seeping in, leading to mold growth and damage. Over time, caulk can deteriorate, crack, or become discolored, requiring replacement. Replacing the caulk around your sink is a simple DIY project that can refresh the look of your space and protect your home from water damage.
Prepare the Area
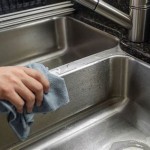
Before you start recaulking, it is essential to prepare the area properly. This will ensure a clean and smooth surface for the new caulk to adhere to. First, remove the old caulk. This can be done using a utility knife or a scraper. Be careful not to damage the countertop or the sink. Once the old caulk is removed, clean the area thoroughly with a damp cloth and a mild detergent. Allow the area to dry completely before proceeding. It is also important to protect the surrounding area from accidental caulk application. This can be done by masking off the countertop and sink using painter's tape.
Apply the Caulk
Once the area is prepared, you can start applying the new caulk. Choose a high-quality caulk specifically designed for kitchen and bathroom use. This type of caulk is mildew-resistant and can withstand the high temperatures and humidity of these environments. The best way to apply caulk is using a caulk gun. Cut the tip of the caulk tube at a 45-degree angle, allowing for a smooth and even bead. Hold the caulk gun at a 45-degree angle and apply a continuous bead of caulk along the seam between the sink and countertop. Maintain a consistent pressure and speed for a uniform application. Avoid applying too much pressure as this can cause the caulk to bulge or become uneven.
Smooth and Finish
After applying the caulk, use a damp finger or a caulk tool to smooth the bead. This will create a clean and professional finish. If using a finger, ensure it is clean and slightly wet. Gently run your finger along the bead to smooth it out, ensuring a continuous and even line. If using a caulk tool, follow the manufacturer's instructions for proper use. Once the caulk is smoothed, allow it to cure completely. This typically takes 24 hours. Avoid using the sink during this time as it can disrupt the curing process. Once the caulk is fully cured, you can remove the painter's tape and enjoy your newly recaulked sink.
Additional Tips
For a more professional look, apply a thin line of caulk around the outside of the sink basin. This creates a clean and polished edge. To prevent caulk from adhering to the sink, apply a thin layer of petroleum jelly to the sink's edge before caulking. This will make it easier to remove the caulk after it dries. If you are using a silicone caulk, apply a sealant to the caulk bead to prevent mold growth. This can be purchased at most hardware stores. It is important to store any extra caulk in a cool, dry place. To prolong the life of your new caulk, avoid using abrasive cleaners or harsh chemicals on the area.

Diy Remove Caulk And Replace In Kitchen Sink Dap Global
How To Re Caulk A Bathroom Sink Ifixit Repair Guide

How To Re Caulk A Sink
How To Re Caulk A Bathroom Sink Ifixit Repair Guide

Easy How To Replace The Silicone On An Undercounter Sink
How To Re Caulk A Bathroom Sink Ifixit Repair Guide
How To Re Caulk A Bathroom Sink Ifixit Repair Guide

How To Caulk Bathroom Surfaces The Inspector Blog

How To Caulk The Kitchen Sink Easy Step By Guide

How To Caulk Your Sink Diy Inspired


