Installing an Under Sink Water Filter: A Comprehensive Guide
An under sink water filter provides a convenient and effective method for improving the quality of drinking water directly at the tap. These systems are typically installed beneath the kitchen sink, filtering water on demand without affecting the water pressure of other fixtures. Compared to pitcher filters or faucet-mounted filters, under sink units offer higher capacity, longer filter life, and improved filtration performance. This article outlines the process of installing an under sink water filter, providing step-by-step instructions and essential considerations for a successful installation.
Before commencing the installation, gathering the necessary tools and materials is paramount. This ensures a smooth and efficient process, minimizing potential complications. The specific tools required may vary slightly depending on the filter system being installed, but the following list represents a comprehensive inventory:
- Adjustable wrench
- Basin wrench (for removing older plumbing)
- Drill with appropriate drill bits (if drilling a new faucet hole)
- Teflon tape
- Bucket
- Screwdriver (Phillips and flathead)
- Pencil or Marker
- Safety glasses
- Gloves
- Measuring tape
- Utility knife (for opening packaging and potentially cutting tubing)
- Optional: Plumber's putty (for sealing the faucet base)
In addition to the tools, the essential materials include the under sink water filter system itself, which should contain all necessary fittings, tubing, and the filter cartridge(s). Verify that all components listed in the manufacturer's instructions are present before starting the installation. A dedicated drinking water faucet is usually included, but if not, one must be purchased separately. Finally, ensure compatability of the filter system with your plumbing system, regarding water pressure and pipe sizes.
Key Point 1: Preparing the Under Sink Area
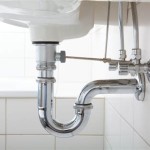
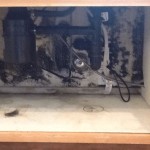
Preparing the under sink area is a critical first step in the installation process. Clear the area beneath the sink by removing any items that may obstruct access to the plumbing. This includes cleaning supplies, food storage containers, or any other objects stored in the cabinet.
Next, turn off the cold water supply to the existing faucet. The shut-off valve is typically located beneath the sink on the cold water supply line. If shut-off valves are not present, the main water supply to the house may need to be turned off. Once the water supply is shut off, open the existing faucet to relieve any pressure in the lines.
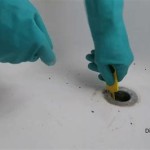
Place a bucket under the cold water supply line to catch any residual water. Disconnect the supply line from the existing faucet. A basin wrench might be necessary if the connection is particularly tight or corroded. Clean the area around the supply valve and the sink surface where the new drinking water faucet will be installed. This ensures a clean and secure connection for the new components.
Inspect the drain lines and garbage disposal (if applicable) for any leaks or potential issues. Addressing these problems before installing the filter system can prevent future complications. If a dishwasher is connected to the same water supply, consider its position and potential interference with the filter system.
The location of the filter unit itself needs to be considered. Find a spot that is easily accessible for future filter changes and doesn't interfere with other plumbing or stored items. Ensure the location is within reach of the tubing and connections provided with the filter system.
Key Point 2: Installing the Dedicated Faucet
The installation of a dedicated drinking water faucet is a crucial component of an under sink water filter system. This faucet provides a separate source of filtered water, distinct from the standard kitchen faucet.
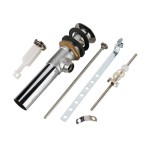
If the sink already has a pre-drilled hole for a soap dispenser or sprayer, this may be utilized for the new faucet. If not, a new hole will need to be drilled. Select a location that is convenient to access and does not interfere with the existing faucet or other sink fixtures. Using the appropriate drill bit for the sink material (stainless steel, porcelain, or composite), carefully drill the hole. Consult the faucet manufacturer's instructions for the correct hole size.
Before inserting the faucet, apply plumber's putty around the base to create a watertight seal. Insert the faucet through the hole and secure it from underneath the sink with the provided hardware. Ensure the faucet is properly aligned and tightened to prevent leaks. Connect the tubing from the filter system to the faucet, following the manufacturer's instructions. Typically, this involves using compression fittings or quick-connect fittings.
Test the faucet for leaks by turning on the cold water supply and running the filtered water. Inspect the connections beneath the sink for any signs of dripping or seepage. If leaks are present, tighten the connections or reapply Teflon tape as needed. Correct alignment of the faucet is also important. The faucet should stand straight and not be tilted.
If the existing sink lacks sufficient clearance for the new faucet's connection points, consider using a flexible extension tube to bridge the gap between the filter system's tubing and the faucet's inlet. These extensions can accommodate tight spaces and prevent kinking or stress on the tubing.
Key Point 3: Connecting the Filter System
Connecting the filter system to the cold water supply is a critical step in ensuring proper operation. Locate the cold water supply line under the sink and identify a suitable point for installing the filter system's adapter.
Most under sink water filter systems utilize a T-fitting or a diverter valve to connect to the cold water supply. The T-fitting is installed inline, allowing water to flow to both the existing faucet and the filter system. The diverter valve, on the other hand, allows the user to switch between unfiltered and filtered water at the primary faucet. Depending on the system, the installation process may vary slightly.
For a T-fitting installation, disconnect the cold water supply line from the existing faucet. Attach the T-fitting to the supply valve and reconnect the supply line to one side of the T-fitting. Connect the tubing from the filter system to the other side of the T-fitting. Ensure that all connections are properly tightened and sealed with Teflon tape. For a diverter valve installation, follow the manufacturer's instructions for connecting the valve to the existing faucet and the filter system. These valves usually have a switch to control the flow of water through the filter.
Install the filter cartridge(s) into the filter housing, following the manufacturer's instructions. Ensure the cartridges are properly seated and the housing is securely closed. Connect the tubing from the T-fitting or diverter valve to the inlet of the filter housing. Connect the tubing from the outlet of the filter housing to the dedicated drinking water faucet.
Slowly turn on the cold water supply and check for leaks at all connections. Allow water to flow through the filter system for the recommended period to flush out any air or debris. The initial water may appear cloudy or discolored, but this is normal. After flushing, the water should run clear and taste clean.
Secure the filter housing to the cabinet wall or base using the provided mounting hardware. This prevents the unit from moving around and potentially damaging the connections. Ensure the tubing is routed in a way that avoids kinks or obstructions.
Consider adding a water leak detector under the sink as a preventive measure. These devices can alert you to any leaks, minimizing potential water damage. These are also helpful for monitoring the performance of the installed filter over time.
Regularly inspect the filter system for leaks and replace the filter cartridges according to the manufacturer's recommendations. This ensures optimal filtration performance and prevents the build-up of contaminants. Keeping a record of the installation date and filter replacement schedule can help maintain the system effectively.
Following these detailed instructions and taking the necessary precautions can ensure a successful installation of an under sink water filter, providing clean and refreshing drinking water for years to come. A properly installed and maintained system offers a significant improvement in water quality and convenience.

Installing Under Sink Water Filtration System Purchase Ie

How To Install A Water Filter Under The Sink Home

Installing An Under Sink Water Filter Fine Homebuilding

How Undersink Water Filters Work

How To Install A Water Filter Under The Sink Home

Faucet How To Convert An Undersink Filter System Above Sink Home Improvement Stack Exchange

Under Sink Water Filter System Install Guide

How To Install A Triple Under Sink Water Filter

How To Install An Under The Sink Water Filter System

Easy Under Cabinet Water Filter Glacier Fresh Installation Handyman Waterfilter Diy