How to Turn Off Water to a Kitchen Sink: A Comprehensive Guide
Turning off the water supply to a kitchen sink is a fundamental skill for any homeowner. It's a necessary step for performing routine maintenance, addressing leaks, replacing faucets, or undertaking any plumbing repairs related to the sink. Understanding the process and identifying the shut-off valves can save time, prevent water damage, and avoid the need for a costly call to a plumber. This article provides a detailed guide on how to locate, identify, and safely shut off the water supply to a kitchen sink.
Identifying the Shut-Off Valves
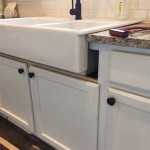
The first step in turning off the water to a kitchen sink is locating the shut-off valves. These valves are typically located directly beneath the sink, inside the cabinet. There are generally two valves: one for the hot water supply and one for the cold water supply. They are usually made of metal, either chrome or brass, and are connected to flexible supply lines that run up to the faucet.
If the valves are not readily visible, it may be necessary to remove items stored under the sink to gain a clearer view. Sometimes, the valves may be partially hidden behind pipes or other obstructions. A flashlight can be helpful in illuminating the area and making the valves easier to identify.
There are two common types of shut-off valves: angle stop valves and straight stop valves. Angle stop valves are positioned at a 90-degree angle, while straight stop valves are in a straight line with the water supply pipe. Both types of valves serve the same purpose – to control the flow of water to the faucet.
In some older homes, the shut-off valves might be located in the basement or another remote location. If the valves are not found under the sink, it may be necessary to consult the home's plumbing diagram or contact a qualified plumber to identify the correct shut-off points.
It's crucial to identify both the hot and cold water valves before proceeding. Turning off only one valve will not completely stop the water flow, and attempting repairs or replacements with water still running can lead to flooding and damage.
The Process of Shutting Off the Water
Once the shut-off valves have been identified, the process of turning off the water is relatively straightforward. The method depends on the type of valve installed. For angle stop and straight stop valves, there is typically a handle or knob that needs to be turned to stop the water flow.
For valves with a handle, turn the handle clockwise until it stops. Do not force the handle if it feels stuck. Applying excessive force can damage the valve and potentially cause a leak. If the handle is difficult to turn, try gently wiggling it back and forth while applying pressure. If it still refuses to turn, it may be necessary to call a plumber to replace the valve.
Some older valves may require a screw to be turned using a flathead screwdriver. Insert the screwdriver into the slot on the valve and turn it clockwise until it stops. Again, avoid forcing the screw if it feels stuck. A lubricant, such as WD-40, might help to loosen a stiff screw.
After turning off the valves, it's essential to test that the water flow has been completely stopped. Turn on the kitchen faucet, both hot and cold, to check for any remaining water flow. If water continues to trickle out, the valves may not be fully closed, or they may be faulty. In this case, try tightening the valves further, but be cautious not to overtighten and damage them. If the water still doesn't stop, it may be necessary to turn off the main water supply to the house.
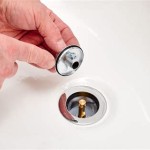
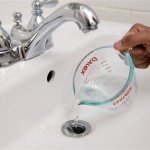
Placing a bucket or towel under the valves before turning them can help catch any drips or spills that may occur during the process. This is particularly important if the valves are slightly corroded or leaking.
If the shut-off valves are old or corroded, they may be difficult to turn or may leak after being turned. It's a good idea to inspect the valves periodically and replace them if they show signs of wear or damage. Replacing faulty valves can prevent future leaks and ensure that the water supply can be shut off quickly and easily in an emergency.
Dealing with Stubborn or Broken Valves and Alternative Shut-Offs
Occasionally, homeowners may encounter problems with stubborn or broken shut-off valves. A valve that is difficult to turn may be corroded or have mineral buildup inside. In such cases, applying a penetrating oil or lubricant can sometimes help to loosen the valve. Allow the lubricant to soak in for a few minutes before attempting to turn the valve again.
If the valve is completely broken or leaking, it's best to avoid attempting to repair it yourself, especially if the main water supply is still on. Instead, turn off the main water supply to the house and call a qualified plumber to replace the valve. Trying to repair a broken valve with the water on can lead to significant water damage.
Turning off the main water supply is typically done at the water meter, which is usually located in the basement, crawl space, or outside in a meter box. The meter has a shut-off valve that can be turned to stop the flow of water to the entire house. It’s useful to know the location of this main shutoff valve in case of any plumbing emergencies.
Before turning off the main water supply, it’s advisable to inform other household members, as it will affect their water usage. Also, consider filling a few pitchers or buckets with water for essential needs, such as flushing toilets or handwashing, while the water is off.
After turning off the main water supply, it’s important to drain the pipes by opening the lowest faucet in the house. This will help to relieve water pressure and prevent any potential damage to the plumbing system.
If you live in an apartment building, the shut-off valves for your kitchen sink may be located in a utility closet or another common area. Contact the building management or maintenance department to locate the valves and determine the proper procedure for turning off the water.
In some cases, there may not be individual shut-off valves for the kitchen sink. In this situation, the only option is to turn off the main water supply to the entire house. This can be inconvenient, but it’s necessary to prevent water damage when performing plumbing repairs or replacements.
Regularly inspecting and maintaining the shut-off valves under the kitchen sink can help prevent future problems. Periodically turning the valves on and off can help keep them from becoming stuck or corroded. If you notice any signs of leaks or damage, it’s important to address them promptly to avoid more serious issues.
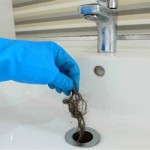
When working with plumbing, it’s always a good idea to wear safety glasses and gloves to protect yourself from potential hazards, such as sharp edges, chemicals, or bacteria. Also, be sure to have a bucket and towels on hand to clean up any spills or leaks.
By following these steps, homeowners can safely and effectively turn off the water to their kitchen sink, preventing water damage and facilitating plumbing repairs. Understanding the location and operation of the shut-off valves is an essential skill for any homeowner.

How To Turn The Water Off Under Sink

How To Turn Off The Water Under Your Sink Checkatrade

How To Shut Off Water Under Sink Youtube

Accessible Water Shut Off Valve And A New Sink Your Plumber Heating Air

How To Turn Off A Water Supply

How Do I Turn Off The Water To My House

How To Turn Off Water Supply A Kitchen Tap

How To Remove A Kitchen Faucet The Home

3 Ways To Turn Off Your Water Supply Quick And Easy Wikihow

Home Repair Water Shut Off Under Kitchen Sink By Froggy