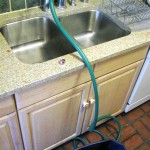
Here's an article focused on changing a kitchen sink faucet.
Changing A Kitchen Sink Faucet: A Comprehensive Guide
Replacing a kitchen sink faucet is a common home improvement project that can be tackled by many homeowners with a basic understanding of plumbing and a few essential tools. While it might seem daunting, breaking the process down into manageable steps can make it a relatively straightforward undertaking, saving on plumbing service costs and providing a sense of accomplishment. This article provides a detailed guide to changing a kitchen sink faucet, covering preparation, removal of the old faucet, installation of the new faucet, and post-installation checks. Safety precautions and common pitfalls are also addressed to ensure a successful outcome.
Preparation and Safety Measures
Before embarking on the faucet replacement, meticulous preparation is paramount. This involves gathering the necessary tools and materials, as well as taking essential safety precautions.
Tools and Materials: A well-equipped toolkit is crucial. Necessary tools typically include an adjustable wrench (or two), a basin wrench (also known as a faucet wrench), a screwdriver set (both Phillips head and flathead), pliers, plumber's putty or silicone sealant, a bucket, a towel or sponge, and safety glasses. Additionally, you'll need the new kitchen faucet and potentially new supply lines, depending on the age and condition of the existing ones. Consider purchasing plumber's tape (Teflon tape) for sealing threaded connections.
Safety First: The initial and most critical step is to shut off the water supply to the faucet. Locate the shut-off valves under the sink. These valves control the hot and cold water lines. Turn both valves clockwise until they are fully closed. Once the valves are closed, turn on the existing faucet to relieve any residual pressure in the lines. Place a bucket under the supply lines to catch any remaining water. If the shut-off valves are corroded or do not function correctly, it’s essential to shut off the main water supply to the entire house. This is usually located in the basement or near the water meter. After shutting off the main supply, test the existing faucet to ensure no water is flowing before proceeding.
Accessibility and Workspace: Clear the area under the sink of any stored items to provide ample workspace. Good lighting is essential; use a work light if the existing lighting is inadequate. Protect the countertop around the sink with a towel or drop cloth to prevent scratches or damage during the removal and installation process. Review the instructions that came with the new faucet. Familiarize yourself with all components and the recommended installation procedure.
Removing the Old Faucet
Removing the old faucet requires patience and careful attention to avoid damaging the sink or the plumbing connections. This process often presents challenges due to corrosion and tight spaces.
Disconnecting the Water Supply Lines: Using an adjustable wrench, carefully disconnect the water supply lines from the tailpieces of the old faucet. Be prepared for some residual water to spill out, even after the shut-off valves are closed. Inspect the supply lines for any signs of corrosion or damage. If they appear worn, replace them with new supply lines.
Loosening the Mounting Hardware: The faucet is typically secured to the sink with mounting nuts or screws. These are usually located beneath the sink, around the faucet tailpieces. Use a basin wrench to loosen the mounting nuts. A basin wrench is specifically designed for reaching into tight spaces and gripping nuts that are difficult to access with a standard wrench. Due to corrosion, these nuts may be difficult to loosen. Penetrating oil can be applied to help loosen stubborn nuts. Allow the oil to soak for several minutes before attempting to loosen the nuts again. If the nuts are severely corroded, consider using bolt cutters or a small saw to cut them off, exercising extreme caution not to damage the sink or the plumbing fixtures.
Removing the Faucet Body: Once the mounting hardware is removed, the faucet body should be free to lift out of the sink. Carefully lift the faucet body and pull the supply lines and tailpieces through the mounting holes. If the faucet is stuck, gently rock it back and forth to break any seals or corrosion that might be holding it in place. Clean the sink surface around the mounting holes with a scraper or putty knife to remove any old plumber's putty or sealant. Ensure the surface is clean and smooth before installing the new faucet.
Installing the New Faucet
The installation of the new faucet involves carefully following the manufacturer’s instructions and ensuring all connections are properly sealed to prevent leaks.
Preparing the Faucet Body: Refer to the manufacturer's instructions for specific assembly details. This may involve attaching the supply lines to the faucet body and installing any necessary mounting hardware. Apply plumber's putty or silicone sealant around the base of the faucet where it will contact the sink. This creates a watertight seal and prevents water from seeping under the faucet.
Positioning and Securing the Faucet: Carefully insert the faucet tailpieces and supply lines through the mounting holes in the sink. Ensure the faucet is properly aligned and centered. From beneath the sink, install the mounting hardware according to the manufacturer's instructions. Tighten the mounting nuts evenly to secure the faucet to the sink. Avoid over-tightening, as this can damage the sink or the faucet. Check the alignment of the faucet from above and make any necessary adjustments before fully tightening the nuts.
Connecting the Water Supply Lines: Connect the water supply lines to the shut-off valves. Use Teflon tape on the threaded connections to ensure a watertight seal. Wrap the tape around the threads in a clockwise direction, overlapping each layer. Tighten the connections with an adjustable wrench, avoiding over-tightening. Ensure the supply lines are not kinked or twisted. If the supply lines are too short or too long, replace them with appropriately sized lines.
Post-Installation Checks and Common Issues
After installing the new faucet, thorough checks are necessary to ensure proper functionality and to prevent leaks. Addressing potential issues promptly can prevent water damage and ensure the longevity of the new faucet.
Leak Testing: Slowly turn on the shut-off valves to restore the water supply. Carefully inspect all connections for leaks. Check the connections between the faucet body and the sink, the supply lines and the faucet tailpieces, and the supply lines and the shut-off valves. If any leaks are detected, tighten the connections slightly. If the leaks persist, disconnect the connections, reapply Teflon tape or plumber's putty, and re-tighten the connections. It may be necessary to replace damaged washers or O-rings to eliminate leaks.
Functionality Testing: Test the hot and cold water flow to ensure proper water pressure and temperature. Check the faucet handle for smooth operation. If the faucet has a sprayer, test its functionality and check for leaks at the sprayer hose connection. Allow the water to run for a few minutes to flush out any debris that may have entered the lines during the installation process.
Common Issues and Troubleshooting: One common issue is low water pressure. This can be caused by debris in the aerator. Remove the aerator and clean it to restore proper water flow. Another common issue is dripping. This can be caused by a faulty cartridge or valve. Refer to the manufacturer's instructions for replacing the cartridge or valve. If the faucet makes noise when it is turned on or off, this can be caused by air in the lines. Allow the water to run for a few minutes to purge the air from the lines. If these issues persist, consulting a qualified plumber may be necessary.

How To Replace A Kitchen Sink Faucet

How To Install A Kitchen Faucet Lowe S

How To Replace A Kitchen Faucet

How To Replace A Kitchen Faucet Youtube

How To Replace A Kitchen Faucet Young House Love

How To Change A Kitchen Faucet Family Handyman

How To Replace A Kitchen Faucet For Newbies Anika S Diy Life

How To Replace A Kitchen Faucet Beginner S Guide The Handyman Daughter

How To Remove And Install A Kitchen Sink Faucet Moen Georgene 87912srs

How To Replace A Kitchen Faucet For Newbies Anika S Diy Life


