Connecting Sink Drain to P-Trap: A Comprehensive Guide
The connection between a sink drain and a P-trap is a crucial element in any plumbing system. This connection ensures wastewater is effectively channeled away from the sink while simultaneously preventing harmful sewer gases from entering the living space. A properly installed and maintained connection is essential for both hygiene and indoor air quality. This article will provide a detailed explanation of the components involved, the steps required for a successful connection, troubleshooting common issues, and relevant maintenance practices.
The primary function of the P-trap is to trap a small amount of water within its curved section. This trapped water acts as a barrier, preventing sewer gases, which can contain methane, hydrogen sulfide, and other potentially harmful substances, from rising up through the drain and into the building. Without a functioning P-trap, these gases can cause unpleasant odors, health concerns, and even potentially explosive conditions. Therefore, understanding how to correctly connect the sink drain to the P-trap and maintaining its integrity is vital.
The connection process typically involves several components, including the tailpiece, which extends downwards from the sink drain, the P-trap itself, and the drainpipe that leads to the main plumbing system. Each component must be properly aligned and securely connected to ensure a leak-proof and functional system. Incorrect installation can lead to water leaks, property damage, and the aforementioned entry of sewer gases into the building. Therefore, meticulous attention to detail is necessary throughout the connection process.
Identifying the Components
Before commencing the connection process, it is essential to accurately identify and understand the function of each component involved. The standard components include the sink drain assembly, the tailpiece, the P-trap, and the drainpipe connecting to the branch drain line. Variations may exist depending on the specific sink and plumbing configuration, but the fundamental principles remain the same.
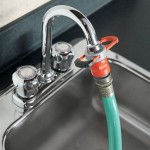
The sink drain assembly, located at the bottom of the sink basin, is responsible for collecting wastewater and directing it towards the drainpipe. This assembly typically includes a strainer to prevent large debris from entering the plumbing system and potentially causing clogs. The drain assembly is usually secured to the sink with a locknut and washer, ensuring a watertight seal.
The tailpiece is a straight section of pipe that extends downwards from the sink drain assembly. It serves as the connecting point between the drain assembly and the P-trap. Tailpieces are commonly available in varying lengths and materials, such as PVC, chrome-plated brass, or polypropylene. The choice of material often depends on aesthetic considerations and local plumbing codes.
The P-trap is a U-shaped pipe designed to trap water and prevent sewer gases from entering the building. It typically consists of a U-bend and two connecting arms. The U-bend is the section where water is retained, while the connecting arms attach to the tailpiece and the drainpipe, respectively. P-traps are typically made of PVC, ABS, or metal.
The drainpipe connects the P-trap to the main drain line, carrying wastewater away from the sink. This pipe is typically made of PVC, ABS, or copper, depending on the building's plumbing system and local regulations. The drainpipe must have a sufficient slope to ensure proper drainage and prevent clogs.
Step-by-Step Connection Process
Connecting the sink drain to the P-trap requires a systematic approach to ensure a secure and leak-proof connection. The following steps outline the typical installation procedure:
1.
Preparation:
Begin by gathering the necessary tools and materials. These typically include pipe wrenches, adjustable pliers, Teflon tape, a utility knife or pipe cutter (depending on the pipe material), and safety glasses. Ensure the work area is well-lit and ventilated. Turn off the water supply to the sink to prevent accidental leaks during the process.2.
Assemble the Tailpiece:
Attach the tailpiece to the sink drain assembly. Apply Teflon tape to the threads of the drain assembly to ensure a watertight seal. Tighten the tailpiece securely using a wrench or pliers, being careful not to overtighten and damage the threads.3.
Position the P-Trap:
Position the P-trap beneath the tailpiece, ensuring that the U-bend is facing downwards. Align the connecting arm of the P-trap with the tailpiece. You might need to adjust the height of the tailpiece or use an extension piece to achieve the correct alignment. Proper alignment is essential to prevent stress on the connections and potential leaks.4.
Connect the P-Trap to the Tailpiece:
Use a slip nut and washer to connect the P-trap to the tailpiece. Ensure the washer is properly seated within the slip nut. Hand-tighten the slip nut initially, then use a wrench or pliers to tighten it further, ensuring a secure connection. Avoid overtightening, as this can damage the plastic components.5.
Connect the P-Trap to the Drainpipe:
Align the remaining connecting arm of the P-trap with the drainpipe. If necessary, cut the drainpipe to the appropriate length using a pipe cutter or utility knife. Deburr the cut end of the pipe to ensure a smooth connection. Use a slip nut and washer to connect the P-trap to the drainpipe, following the same tightening procedure as before.6.
Test for Leaks:
Once all connections are secured, turn the water supply back on and carefully inspect for leaks. Run water into the sink and check all connections, including the tailpiece, P-trap connections, and drainpipe connection. If any leaks are detected, tighten the corresponding slip nut or connection until the leak stops. In some cases, it may be necessary to disassemble the connection, apply fresh Teflon tape, and reassemble it.7.
Final Inspection:
After verifying that there are no leaks, conduct a final inspection to ensure all components are properly aligned and securely connected. Ensure the P-trap is positioned correctly and the drainpipe has a sufficient slope to facilitate proper drainage. Clean up the work area and dispose of any waste materials properly.Troubleshooting Common Issues
Despite careful installation, certain issues may arise during or after the connection process. Addressing these issues promptly is crucial to maintaining a functional and leak-free system.
One common issue is leaking connections. Leaks can occur due to loose slip nuts, damaged washers, or improperly applied Teflon tape. To address leaks, first, identify the source of the leak. Then, tighten the corresponding slip nut using a wrench or pliers. If tightening the slip nut does not resolve the leak, disassemble the connection, inspect the washer for damage, and replace it if necessary. Apply fresh Teflon tape to the threads and reassemble the connection, ensuring it is properly aligned and securely tightened.
Another common issue is slow drainage. Slow drainage can be caused by a partial clog in the drainpipe or P-trap. To address slow drainage, first, try using a plunger to dislodge any potential clogs. If plunging is unsuccessful, disassemble the P-trap and inspect it for debris or blockages. Clean the P-trap thoroughly and reassemble it. If the problem persists, the clog may be further down the drainpipe, requiring the use of a drain snake or chemical drain cleaner (following the manufacturer's instructions carefully).
Misalignment of components can also lead to problems. If the tailpiece, P-trap, or drainpipe are not properly aligned, it can create stress on the connections and increase the risk of leaks. To address misalignment, carefully reposition the components to ensure they are aligned correctly. Use extension pieces or adjustable elbows if necessary to achieve proper alignment. Ensure all connections are securely tightened after making adjustments.
Damaged components can also cause issues. Inspect all components for cracks, breaks, or other signs of damage. Replace any damaged components with new ones before proceeding with the connection process. Using damaged components can compromise the integrity of the system and lead to leaks or other problems.
Galvanic corrosion can occur when dissimilar metals are in contact in a wet environment. This can cause the metal to corrode and leak. To prevent galvanic corrosion, use dielectric unions between dissimilar metals. This will insulate the metals from each other and prevent the flow of electricity that causes corrosion.
Maintenance Practices
Regular maintenance is essential for ensuring the long-term functionality and reliability of the sink drain and P-trap connection. Proper maintenance practices can prevent clogs, leaks, and other issues, saving time and money in the long run.
One important maintenance practice is to regularly flush the drain with hot water. Hot water can help dissolve grease and other buildup that can contribute to clogs. Run hot water down the drain for several minutes each week to keep the drain clear.
Avoid pouring grease, oil, or other solid waste down the drain. These materials can solidify and accumulate in the drainpipe, leading to clogs. Dispose of grease and oil in a separate container and discard it properly.
Periodically inspect the P-trap and drainpipe for leaks or damage. Check all connections for signs of corrosion or wear. Address any issues promptly to prevent them from escalating into more significant problems.
Consider using a drain strainer to prevent hair, food particles, and other debris from entering the drainpipe. Clean the strainer regularly to prevent it from becoming clogged. This simple measure can significantly reduce the risk of clogs and maintain proper drainage.
Occasionally, it may be necessary to disassemble the P-trap and clean it thoroughly. Remove any accumulated debris or buildup. Reassemble the P-trap carefully, ensuring all connections are secure and leak-proof.
By following these maintenance practices, individuals can ensure the long-term functionality and reliability of the sink drain and P-trap connection, preventing costly repairs and maintaining a hygienic plumbing system.

How To Install P Trap And Bathroom Sink Drain Piping Easy Installation For Beginners Youtube

How To Install A P Trap Oatey

How To Install A Kitchen Sink Drain

Bathroom Sink Plumbing Installation Diy Montreal

Welcome To Permaflow

How To Install A P Trap Oatey

Replace A Trap And Add Cleanout Fine Homebuilding

P Trap Installation Drain Doesn T Line Up With Bathroom Sink Pipe 2024

What Is A P Trap Family Handyman

Bathroom Sink Plumbing Installation Diy Montreal