Double Bowl Sink Drainage Installation: A Comprehensive Guide
Installing the drainage system for a double bowl sink can seem complex due to the increased number of connections compared to a single bowl sink. A successful installation, however, is achievable with careful planning, the right tools, and a clear understanding of the necessary steps. This article provides a detailed guide to navigating the intricacies of double bowl sink drainage installation.
The primary function of a double bowl sink drainage system is to efficiently remove wastewater from both bowls simultaneously. It must also prevent sewer gases from entering the home, which is achieved through proper venting and the strategic placement of a P-trap. Furthermore, the system needs to be leak-proof to avoid water damage and maintain a sanitary environment.
Planning and Preparation: Laying the Groundwork for Success
Before commencing the physical installation, meticulous planning is essential. This stage involves several crucial steps, starting with gathering the necessary materials and tools. Common materials include PVC or ABS pipes (depending on local plumbing codes), various fittings (tees, elbows, couplings), a P-trap, tailpieces, a center outlet waste tee (also known as a continuous waste tee), plumber's putty or silicone sealant, Teflon tape, and solvent cement (for PVC or ABS connections). Essential tools consist of a pipe cutter or saw, measuring tape, sandpaper, a wrench, a level, and safety glasses.
Prior to purchasing materials, accurately measure the distance between the sink bowls' drain openings and the distance from the drain openings to the main drainpipe in the wall. These measurements are vital for determining the required lengths of pipes and the number of fittings needed. Creating a simple sketch of the intended drainage layout can be immensely helpful in visualizing the connections and ensuring accurate measurements.
Beyond materials and measurements, familiarize oneself with local plumbing codes. These codes dictate acceptable materials, pipe sizes, venting requirements, and other regulations that impact plumbing installations. Ignoring these codes can result in failed inspections and costly rework. Contacting the local building department or consulting with a licensed plumber can provide clarity on specific code requirements in the area.
Finally, prepare the workspace. Clear the area beneath the sink to allow ample room for maneuvering and working. Protect the surrounding surfaces with drop cloths to prevent scratches and spills. Ensure adequate lighting to enhance visibility and minimize errors during the installation process.
Step-by-Step Installation: Connecting the Drainage System
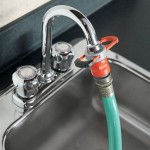
The installation process begins with assembling the tailpieces. These are the vertical pipes that connect directly to the drain openings in each sink bowl. Apply a bead of plumber's putty or silicone sealant around the drain opening on the underside of the sink and insert the tailpiece. Tighten the mounting nut from below, ensuring a watertight seal. Remove any excess putty or sealant.
Next, install the center outlet waste tee. This fitting connects the two tailpieces and directs the wastewater towards the P-trap. Position the waste tee beneath the tailpieces and measure the distance between the tailpieces and the inlets of the waste tee. Cut two pieces of pipe to the required lengths. Apply solvent cement to the ends of the pipes and to the inside of the waste tee inlets, then insert the pipes into the inlets. Hold the connections firmly until the cement sets.
The P-trap is a U-shaped pipe that traps a small amount of water, preventing sewer gases from entering the home through the drain. Connect the P-trap to the outlet of the center outlet waste tee. Depending on the configuration, this may require cutting a short length of pipe and connecting it with a coupling. Ensure the P-trap is easily accessible for future cleaning and maintenance.
The final connection involves connecting the outlet of the P-trap to the main drainpipe in the wall. Measure the distance and cut a piece of pipe to the appropriate length. Connect the pipe to the P-trap outlet and to the drainpipe using suitable fittings, such as a 45-degree or 90-degree elbow, as needed. Apply solvent cement to all PVC/ABS connections.
Throughout the installation, ensure that all connections are properly aligned and supported. Use pipe straps or clamps to secure the drainage pipes to the cabinet walls or floor, preventing sagging and potential leaks. Pay close attention to the slope of the horizontal pipes, ensuring a slight downward angle towards the drain to facilitate efficient water flow.
Leak Testing and Troubleshooting: Ensuring System Integrity
Once the drainage system is fully assembled, conducting a thorough leak test is crucial. Plug both sink drains and fill the bowls with water. Observe all connections carefully for any signs of leaks. If leaks are detected, tighten the connections or disassemble the joint and reapply plumber's putty or solvent cement as needed.
In addition to checking for leaks, test the drainage flow. Remove the plugs and observe how quickly the water drains from both bowls. Slow drainage may indicate a blockage or an improperly sloped pipe. If slow drainage is observed, check for obstructions in the pipes or P-trap. Ensure that the vent is not blocked, as proper venting is essential for efficient drainage.
Common issues encountered during double bowl sink drainage installation include misaligned pipes, loose connections, and improper venting. Misaligned pipes can be corrected by carefully adjusting the pipe positions and using flexible couplings where necessary. Loose connections should be tightened or re-sealed to prevent leaks. Improper venting can be addressed by installing an air admittance valve (AAV) if a traditional vent pipe is not feasible. An AAV allows air to enter the drainage system, equalizing pressure and preventing siphoning of the P-trap water.
If persistent leaks or drainage problems are encountered, consulting a licensed plumber is recommended. A professional plumber possesses the expertise and tools to diagnose complex issues and implement effective solutions.
Proper selection of drain pipes is crucial for a lasting and effective installation. While PVC and ABS are common choices, their suitability depends on local codes and personal preferences. PVC is generally less expensive and more resistant to chemicals, whereas ABS is more impact-resistant and flexible. Understanding the properties of each material is key to making an informed decision.
The use of Teflon tape on threaded connections, such as those found on tailpieces and P-traps, provides an extra layer of protection against leaks. Wrap the tape around the threads in a clockwise direction, overlapping each layer slightly. This creates a tighter seal and prevents water from seeping through the threads. Ensure that the tape is applied evenly and not excessively, as too much tape can interfere with the connection.
Regular maintenance of the double bowl sink drainage system is essential for preventing clogs and ensuring long-term performance. Periodically flush the drain with hot water and baking soda to dissolve grease and other buildup. Avoid pouring grease, food scraps, or other debris down the drain. Consider using a drain strainer to catch larger particles and prevent them from entering the pipes. Inspect the P-trap regularly for sediment buildup and clean it as needed.
Choosing the right type of P-trap can also enhance the system's efficiency. While standard P-traps are commonly used, drum traps offer a larger capacity for sediment collection. However, drum traps are more prone to clogging and may require more frequent cleaning. Select a P-trap that is appropriate for the anticipated wastewater volume and maintenance frequency.
Properly sloping the drain pipes is paramount for preventing water from pooling and causing clogs. The recommended slope is typically 1/4 inch per foot, meaning that the pipe should descend 1/4 inch for every foot of horizontal distance. This slope ensures that wastewater flows freely towards the drain and minimizes the risk of sediment buildup. Use a level to verify the slope during installation and make adjustments as needed.

How To Connect A Kitchen Sink Drain

Kitchen Sink Drainage Step By Youtube

Keeney Double Bowl Sink End Outlet Supply And Drainage Installation Kit Lbowlsink

How To Install Kitchen Sink Drain For Beginners

How To Properly Install A Drain On Double Sink Like Pro

Double Bowl Sink Kit Mcalpine Plumbing

Snappytrap 1 2 In All One Drain Kit For Double Bowl Kitchen Sinks Dk 110

How To Change Under Sink Plumbing Add Bunnings Work Community

Kitchen Double Sink Installation Kit 1 2 In Pipe Drain Kits Valves

Snappytrap 1 2 In All One Drain Kit For Double Bowl Kitchen Sinks Dk 110