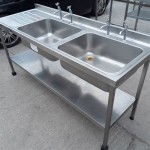
How To Connect Sink Drain
Connecting a sink drain is a fairly simple plumbing task that can be completed in a few minutes with the right tools. Here are the steps on how to connect a sink drain:
Tools and materials you will need:
- Adjustable wrench
- Plumber's putty
- Sink drain assembly
- Tailpiece
- Slip joint nut
- Trap
- P-trap
Step 1: Remove the old drain assembly
If there is an existing drain assembly, you will need to remove it before you can install the new one. To do this, use an adjustable wrench to loosen the slip joint nut that connects the tailpiece to the trap. Once the nut is loose, you can remove the tailpiece and the old drain assembly.
Step 2: Apply plumber's putty to the sink drain
Before you install the new drain assembly, you will need to apply a bead of plumber's putty to the rim of the sink drain. This will help to create a watertight seal between the drain and the sink.
Step 3: Install the sink drain assembly
Once you have applied plumber's putty to the sink drain, you can install the new drain assembly. To do this, insert the drain assembly into the sink drain and tighten the slip joint nut until it is snug. Be careful not to overtighten the nut, as this could damage the drain assembly.
Step 4: Install the tailpiece
Once the drain assembly is installed, you can install the tailpiece. To do this, insert the tailpiece into the drain assembly and tighten the slip joint nut until it is snug. Again, be careful not to overtighten the nut.
Step 5: Install the trap
The trap is a U-shaped pipe that helps to prevent sewer gases from entering the sink. To install the trap, insert the trap into the tailpiece and tighten the slip joint nut until it is snug. Be sure to orient the trap so that the open end is facing down.
Step 6: Install the P-trap
The P-trap is a curved pipe that connects the trap to the drainpipe. To install the P-trap, insert the P-trap into the trap and tighten the slip joint nut until it is snug. Again, be sure to orient the P-trap so that the open end is facing down.
Step 7: Test the drain
Once the drain is assembled, you can test it by running water into the sink. If there are any leaks, you may need to tighten the slip joint nuts or adjust the position of the drain assembly.

How To Easily Connect The Plumbing For A New Bathroom Sink Hometips

How To Install A Kitchen Sink Drain

How To Connect A Kitchen Sink Drain Youtube

How To Install Bathroom Sink Drain Queen Bee Of Honey Dos

How To Install A Kitchen Sink Drain

Kitchen Sink Plumbing How To Make A Drain Better

How To Connect A Bathroom Sink Drain Youtube

How To Install A Pipe From Sink Drain Wall Ehow

How To Replace A Kitchen Sink Basket Strainer Diy Family Handyman

How To Connect A Kitchen Sink Drain 2024