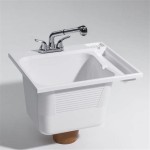
How To Fix Leaking Pipe Under Sink
A leaking pipe under the sink can be a major inconvenience, but it's also a relatively easy problem to fix. With a few simple tools and a little bit of time, you can get your sink back up and running in no time. Here's a step-by-step guide on how to fix a leaking pipe under the sink:
1. Gather your tools and materials
Before you start, you'll need to gather a few tools and materials. Here's a list of what you'll need:
- Adjustable wrench
- Pliers
- Flashlight
- Bucket or bowl
- Replacement pipe
- Pipe sealant
- Teflon tape
2. Turn off the water supply
The first step is to turn off the water supply to the sink. This will prevent any water from leaking out while you're working. To turn off the water supply, simply locate the shut-off valves under the sink and turn them clockwise. Once the water is turned off, open the faucet to release any remaining water in the pipes.
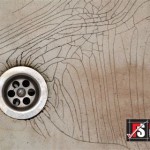
3. Locate the leak
Once the water is turned off, you can start looking for the leak. Use a flashlight to inspect the pipes under the sink. The leak will likely be visible as a small drip or stream of water. If you can't see the leak, try running your hand along the pipes to feel for moisture.
4. Remove the damaged pipe
Once you've located the leak, you can start removing the damaged pipe. To do this, simply use an adjustable wrench to loosen the nuts that are holding the pipe in place. Once the nuts are loose, you can pull the pipe out of the fitting.
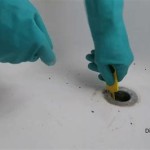
5. Clean the fittings
Before you install the new pipe, it's important to clean the fittings. This will help to ensure a good seal and prevent future leaks. To clean the fittings, simply use a cloth or brush to remove any dirt or debris. You can also apply a small amount of pipe sealant to the fittings to help create a better seal.
6. Install the new pipe
Now you can install the new pipe. To do this, simply insert the pipe into the fitting and tighten the nuts. Be sure to tighten the nuts securely, but don't overtighten them. Once the nuts are tight, turn on the water supply and check for leaks.
7. Finish up
If there are no leaks, you're all finished! Simply put everything back in place under the sink and you're good to go.

4 Simple Ways To Fix A Leaky Sink Drain Pipe Wikihow

4 Simple Ways To Fix A Leaky Sink Drain Pipe Wikihow

How To Fix Kitchen Sink P Trap Leaking Pipe Connection Nut Youtube

4 Simple Ways To Fix A Leaky Sink Drain Pipe Wikihow

How To Repair A Leaking Sink Trap

How To Fix Or Replace A Leaky Sink Trap Hometips

How To Remove A Leaky Pipe Under The Kitchen Sink Wellsons

Plumbing How To Properly Fix Leaky Pipe Connections Under Sink Home Improvement Stack Exchange

4 Ways To Fix Your Kitchen Sink Wikihow

Home Improvement Made Easy Fix A Leaky Sink Pipe Denver Urban Renewal Authority