How to Install a Bathroom Sink Cabinet
Installing a bathroom sink cabinet can seem like a daunting task, but with the right tools and a little preparation, it can be completed in a few hours. Here is a step-by-step guide to help you through the process:
Materials Needed:
* Bathroom sink cabinet * Sink * Faucet * P-trap * Toilet flange * Adjustable wrench * Plumber's putty * Level * Measuring tape * Caulk gun * Caulk * Screwdriver * Utility knifeStep 1: Prepare the Area
Clear the area where the sink cabinet will be installed and remove any old fixtures. Shut off the water supply to the sink and disconnect the drain line. If the old sink cabinet is attached to the wall, remove the screws or bolts that hold it in place.
Step 2: Assemble the Cabinet
If the sink cabinet comes disassembled, follow the manufacturer's instructions to assemble it. Make sure that all the screws and bolts are tightened securely.
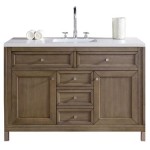
Step 3: Level the Cabinet
Place the cabinet in the desired location and use a level to check if it is level both front to back and side to side. Adjust the legs of the cabinet as needed to level it. Once the cabinet is level, secure it to the wall or floor according to the manufacturer's instructions.
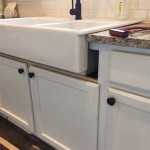
Step 4: Install the Sink
Apply a bead of plumber's putty around the rim of the sink opening in the cabinet. Carefully place the sink into the opening and press down firmly to seat it in the putty. Wipe away any excess putty.
Step 5: Connect the Faucet
Connect the faucet to the sink according to the manufacturer's instructions. Make sure that all the connections are tight. Turn on the water supply and check for leaks.
Step 6: Install the P-trap
Connect the P-trap to the drain opening in the sink. The P-trap is a U-shaped pipe that prevents sewer gases from entering the bathroom. Tighten the nuts on the P-trap securely.
Step 7: Connect the Toilet Flange
If the sink cabinet is located near a toilet, connect the toilet flange to the drain opening in the floor. The toilet flange is a metal ring that provides a secure connection between the toilet and the drain.
Step 8: Caulk the Joints
Run a bead of caulk around all the joints where the sink, faucet, and P-trap connect to the cabinet. This will help to prevent leaks and create a finished look.
Step 9: Clean Up
Remove any excess caulk and clean up the area. Turn on the water supply and check for leaks one last time. If there are no leaks, your bathroom sink cabinet is now installed and ready to use.

How To Install A Bathroom Vanity Youtube

How To Install A Bathroom Vanity Youtube

How To Install Or Remove A Bathroom Vanity Homeserve Usa

Youtube

Youtube

12 Easy Steps To Install Bathroom Vanity And Sink

How To Replace Install A Bathroom Vanity And Sink Small Vanities Diy Trendy

Tutorial How To Install A Bathroom Vanity The Diy Playbook

Tutorial How To Install A Bathroom Vanity The Diy Playbook

How To Install A Vanity Forbes Home