How To Install A New Sink
Replacing a kitchen sink is a simple plumbing project that usually takes 1 to 2 hours. You can save on plumbing costs by doing it yourself. Here are the steps to install a new sink.
Step 1: Planning
Before you start, you need to plan the layout of your new sink. This includes determining the location of the sink, the size of the sink, and the type of sink you want. You also need to make sure that you have all the necessary tools and materials.
Step 2: Remove the Old Sink
Once you have planned the layout of your new sink, you can start removing the old sink. To do this, you will need to turn off the water supply to the sink and disconnect the drain and supply lines. Once the water supply is turned off, you can use a wrench to remove the nuts that hold the sink in place. Once the nuts are removed, you can lift the sink out of the cabinet.
Step 3: Clean the Sink Hole
Once the old sink is removed, you can clean the sink hole. To do this, you will need to remove any old sealant or caulk from the sink hole. You can use a putty knife to remove the old sealant or caulk. Once the sink hole is clean, you can apply a new bead of caulk around the edge of the sink hole.
Step 4: Place the Sink in the Sink Hole
Once the sink hole is clean, you can place the new sink in the sink hole. To do this, you will need to carefully lift the sink into the sink hole. Once the sink is in place, you can use a level to make sure that the sink is level. Once the sink is level, you can use a wrench to tighten the nuts that hold the sink in place.
Step 5: Connect the Water Supply Lines
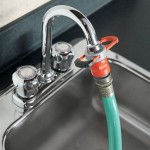
Once the sink is in place, you can connect the water supply lines. To do this, you will need to use a wrench to connect the water supply lines to the sink. Once the water supply lines are connected, you can turn on the water supply to the sink.
Step 6: Connect the Drain Line
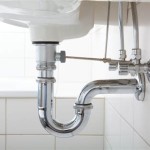
Once the water supply lines are connected, you can connect the drain line. To do this, you will need to use a wrench to connect the drain line to the sink. Once the drain line is connected, you can turn on the water to the sink and check for leaks.
Step 7: Install the Faucet
Once the sink is installed, you can install the faucet. To do this, you will need to follow the manufacturer's instructions. Once the faucet is installed, you can turn on the water to the sink and check for leaks.
Step 8: Clean Up
Once the sink is installed, you can clean up. To do this, you will need to wipe down the sink and the surrounding area. You can also use a vacuum cleaner to clean up any debris.

How To Install A Drop In Kitchen Sink

The Benefits Of Installing A New Sink Plumbing Solutions Llc

How To Replace And Install An Undermount Sink

How To Install A Drop In Kitchen Sink Lowe S

How To Install A New Kitchen Sink Part 1

How To Install A Drop In Sink Professionally Ge Sealants

How To Replace A Kitchen Sink The Home

How To Install A New Kitchen Sink Faucet And Drain Diy Plumbing

3 Simple Ways To Install An Undermount Sink Wikihow

How To Install A Drop In Kitchen Sink Lowe S


