How To Install A Pedal Sink
Pedal sinks, also known as foot-operated sinks, are a convenient and hygienic way to wash your hands without having to touch any handles. They are often used in public restrooms, but they can also be installed in homes and businesses. If you are considering installing a pedal sink, here is a step-by-step guide to help you get started.
Step 1: Gather Your Materials
Before you begin, you will need to gather the following materials:
- Pedal sink
- Faucet
- Drain
- P-trap
- Wrench
- Screwdriver
- Plumber's putty
- Teflon tape
Step 2: Prepare the Sink
Once you have gathered your materials, you need to prepare the sink for installation. First, remove the packing materials from the sink and inspect it for any damage. If there is any damage, do not install the sink and contact the manufacturer.
Next, attach the faucet to the sink. The faucet should come with instructions on how to do this. Once the faucet is attached, you need to install the drain. The drain should also come with instructions on how to do this.
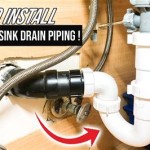
Step 3: Install the P-trap
The P-trap is a curved pipe that connects the drain to the sink. It helps to prevent sewer gases from escaping into the room. To install the P-trap, first, place the washer on the bottom of the sink drain. Then,screw the P-trap onto the drain.
Step 4: Connect the Water Supply
Now you need to connect the water supply to the faucet. First, turn off the water supply to the sink. Then, connect the water supply lines to the faucet. Be sure to use Teflon tape on the threads of the water supply lines to prevent leaks.
Step 5: Mount the Sink
Once the water supply is connected, you can mount the sink. First, apply a bead of plumber's putty around the rim of the sink. Then, place the sink in the hole in the countertop. Be sure to center the sink and press it down firmly.
Step 6: Secure the Sink
Once the sink is mounted, you need to secure it. There are two ways to do this. You can either use mounting brackets or screws. If you are using mounting brackets, simply attach the brackets to the sink and then screw them into the countertop.
If you are using screws, first, drill pilot holes through the countertop. Then, screw the screws into the pilot holes and tighten them until the sink is secure.
Step 7: Test the Sink
Once the sink is secure, you need to test it to make sure it is working properly. Turn on the water supply and check for any leaks.
Step 8: Finish Up
Once you have tested the sink and made sure it is working properly, you can finish up by applying a bead of caulk around the rim of the sink. This will help to seal the sink and prevent water from leaking out.
Your pedal sink is now installed and ready to use. Enjoy the convenience of being able to wash your hands without having to touch any handles.

How To Install A Pedestal Sink The Home

How To Install A Pedestal Sink Elevate Your Bathroom

How To Install A Pedestal Sink And Faucet By Home Repair Tutor

How To Install A Pedestal Sink Elevate Your Bathroom

How To Install A Pedestal Sink Without Wall Studs

How To Install A Pedestal Sink Pro Tips Plan Learn Build

How To Install A Pedestal Sink Elevate Your Bathroom

How To Install A Pedestal Basin Youtube

Step By On How To Install A Pedestal Sink

How To Install A Pedestal Sink Elevate Your Bathroom