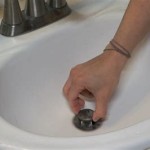
How To Install Sink Faucet
Installing a sink faucet is a relatively simple plumbing task that can be completed in a few hours. By following these step-by-step instructions, you can save yourself the cost of hiring a plumber and have a new faucet up and running in no time.
Step 1: Gather Your Tools and Materials
Before you begin, you will need to gather the following tools and materials:
- New sink faucet
- Adjustable wrench
- Plumber's putty
- Teflon tape
- Basin wrench
- Screwdriver
- Bucket
- Rags
Step 2: Turn Off the Water Supply
The first step is to turn off the water supply to the sink. There will be two valves under the sink, one for hot water and one for cold water. Turn both valves clockwise until they are completely closed.
Step 3: Disconnect the Old Faucet
Using the adjustable wrench, loosen the nuts that hold the old faucet in place. Be careful not to overtighten the nuts, as this can damage the faucet or the sink. Once the nuts are loose, you can remove the old faucet by pulling it straight up.
Step 4: Clean the Sink Surface
Use a damp rag to clean the surface of the sink where the new faucet will be installed. This will help to ensure that the new faucet will fit properly and seal correctly.
Step 5: Apply Plumber's Putty
Roll a small amount of plumber's putty into a snake-like shape. Then, apply the putty to the underside of the new faucet's base plate. The putty will help to create a watertight seal between the faucet and the sink.
Step 6: Wrap the Threads with Teflon Tape
Wrap the threads of the new faucet's water supply lines with Teflon tape. The Teflon tape will help to prevent leaks.
Step 7: Install the New Faucet
Place the new faucet in the hole in the sink. Slide the faucet's base plate over the hole and tighten the nuts until they are snug. Be careful not to overtighten the nuts, as this can damage the faucet or the sink.
Step 8: Connect the Water Supply Lines
Connect the hot and cold water supply lines to the new faucet. Tighten the nuts on the water supply lines until they are snug. Be careful not to overtighten the nuts, as this can damage the water supply lines.
Step 9: Turn On the Water Supply
Slowly turn on the water supply valves under the sink. Check for leaks around the faucet and the water supply lines. If you find any leaks, tighten the nuts until the leaks stop.
Step 10: Adjust the Faucet Handles
Adjust the faucet handles to the desired water temperature and flow rate. You may need to use a screwdriver to adjust the set screws on the handles.
Step 11: Clean Up
Use a damp rag to clean up any water or debris that may have spilled during the installation process.
Congratulations! You have now successfully installed a new sink faucet.

How To Replace A Kitchen Sink Faucet

Diy How To Replace And Install A Bathroom Sink Faucet

How To Install A Faucet 10 Steps With Pictures Wikihow

How To Install A Kitchen Faucet The Home

How To Replace A Kitchen Faucet Young House Love

How To Install A Bathroom Faucet The Home

How To Install A Faucet 10 Steps With Pictures Wikihow

Installation Instructions Venice Single Handle Pull Down Kitchen Sink Faucet

How To Replace A Bathroom Faucet Removal And Installation

How To Install A Kitchen Faucet The Home


