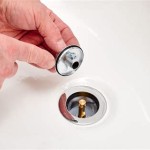
How To Install an Under Mount Sink
Installing an under mount sink offers a sleek and modern aesthetic to any kitchen or bathroom. Unlike drop-in sinks, under mount sinks are installed beneath the countertop, creating a seamless and clean look. While this project can be tackled by a diligent DIY enthusiast, it requires careful planning, precise measurements, and a thorough understanding of the steps involved. This article provides a comprehensive guide to installing an under mount sink, ensuring a successful and professional-looking outcome.
Before commencing the installation, it is crucial to gather all the necessary tools and materials. This proactive step will streamline the process and minimize potential delays. Ensure the availability of the following items:
- Under mount sink
- Countertop (with pre-cut opening or the means to cut one)
- Mounting clips or adhesive
- Silicone sealant
- Level
- Measuring tape
- Pencil or marker
- Safety glasses
- Gloves
- Drill with appropriate drill bits
- Clamps (if using mounting clips)
- Clean rags or sponges
- Plumber's putty (optional, for drain assembly)
- Plumbing wrench
- Bucket
It is also vital to disconnect the water supply before starting any plumbing work. Locate the shut-off valves for both the hot and cold water lines under the sink. Turn these valves clockwise until they are fully closed. To ensure that the water is completely shut off, turn on the faucet briefly to relieve any remaining pressure in the pipes. Place a bucket beneath the pipes to catch any residual water that may drip out during the disconnection process.
Preparation is Key: Countertop Considerations and Sink Placement
The most critical factor in a successful under mount sink installation is the countertop. Ideally, the countertop should have a pre-cut opening designed specifically for the chosen under mount sink model. If the countertop is new or being replaced along with the sink, it is highly recommended to have the countertop professionally fabricated with the sink opening pre-cut. This ensures accuracy and avoids the risks associated with cutting the countertop yourself.
If a pre-cut opening is not available, the installer will need to create one. This process requires specialized tools and expertise, particularly when dealing with materials like granite or quartz. Attempting to cut these materials without the proper equipment and technique can result in irreparable damage to the countertop. For laminate or solid surface countertops, a jigsaw with a fine-tooth blade can be used, but extreme caution is necessary to avoid chipping or cracking the surface. Always consult with a professional if unsure about cutting the countertop.
Before proceeding with the installation, dry-fit the sink within the opening to confirm the fit. Ensure that the sink sits flush against the underside of the countertop and that there are no gaps or obstructions. Use a level to verify that the countertop surface is even. Any unevenness should be addressed before proceeding, as it can affect the stability and appearance of the installed sink.
Once the fit is confirmed, meticulously clean the underside of the countertop and the top edge of the sink where they will make contact. This step is essential for proper adhesion of the sealant and secure mounting of the sink. Use a degreaser or all-purpose cleaner to remove any dirt, grease, or debris from the surfaces. Wipe the surfaces dry with a clean rag.
Securing the Sink: Mounting Methods and Sealant Application
There are two primary methods for securing an under mount sink to the countertop: using mounting clips or using a strong adhesive. The choice between these methods depends on the sink material, countertop material, and personal preference. Mounting clips provide a mechanical attachment, while adhesive offers a chemical bond. Some installations may benefit from a combination of both methods for enhanced security.
When using mounting clips, determine the appropriate placement of the clips around the perimeter of the sink. The number of clips required will vary depending on the size and weight of the sink, but as a general guideline, space the clips approximately 6-8 inches apart. Mark the locations for the clip anchors on the underside of the countertop. Use a drill with the appropriate drill bit to create pilot holes for the anchors. Secure the anchors into the pilot holes. Position the mounting clips over the anchors and tighten the screws or bolts to secure the sink to the countertop. Apply gentle and even pressure to avoid over-tightening, which could damage the countertop or sink.
When using adhesive, select a high-quality silicone sealant specifically designed for plumbing applications. Ensure that the sealant is compatible with both the sink and countertop materials. Apply a generous bead of sealant along the top edge of the sink where it will contact the underside of the countertop. Carefully position the sink within the opening and press it firmly against the underside of the countertop. Use clamps to hold the sink in place while the sealant cures. Refer to the sealant manufacturer's instructions for the recommended curing time, which is typically 24-48 hours. After the sealant has cured, remove the clamps and inspect the seal for any gaps or imperfections. Apply additional sealant as needed to ensure a watertight seal.
Regardless of the chosen mounting method, it is essential to ensure that the sink is level after installation. Use a level placed across the sink basin to verify that it is perfectly horizontal. If necessary, make minor adjustments to the mounting clips or adhesive to achieve a level installation. A level sink is crucial for proper drainage and preventing water from pooling in one area.
Plumbing Connections: Drain Assembly and Water Line Hookups
Once the sink is securely mounted, the next step is to connect the plumbing. This involves assembling the drain and attaching the water supply lines. Begin by assembling the drain components according to the manufacturer's instructions. Plumber's putty may be used to create a watertight seal between the drain flange and the sink basin. Roll a rope of plumber's putty and press it around the underside of the drain flange before inserting it into the drain opening. Tighten the drain assembly securely using a wrench, but avoid over-tightening, which could damage the sink or drain components.
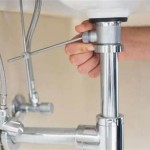
Next, connect the trap to the drain assembly. The trap is a curved section of pipe that prevents sewer gases from entering the building through the drain. Ensure that the trap is properly aligned and securely connected to the drain assembly. Tighten the slip nuts that secure the trap to the drain and tailpiece. Inspect the connections for any leaks. If leaks are detected, tighten the slip nuts further or disassemble the connections and reapply plumber's putty or Teflon tape to the threads.
Finally, connect the water supply lines to the faucet. Ensure that the hot and cold water lines are connected to the correct faucet inlets. Use a wrench to tighten the connections securely, but avoid over-tightening. Turn on the shut-off valves slowly to allow water to flow into the faucet. Inspect the connections for any leaks. If leaks are detected, tighten the connections further or replace the supply lines if necessary.
After completing all the plumbing connections, run water into the sink to test for leaks. Check all the connections, including the drain assembly, trap, and water supply lines. If any leaks are detected, immediately shut off the water supply and address the issues. Once all leaks are resolved, thoroughly clean the sink and surrounding countertop area. Remove any excess sealant or debris. The under mount sink installation is now complete.
It is important to note that building codes vary by locality, and it is the installer's responsibility to ensure that the installation complies with all applicable codes. If unsure about any aspect of the installation, consult with a qualified plumber or building inspector.

How I Fit An Undermount Sink For Easy Maintenance

How To Install Undermount Kitchen Sinks Concrete Countertop Institute

Diy Easy Undermount Sink Install Youtube

How To Replace And Install An Undermount Sink

How To Install Undermount Kitchen Sinks Concrete Countertop Institute

3 Simple Ways To Install An Undermount Sink Wikihow

3 Simple Ways To Install An Undermount Sink Wikihow

How To Install An Undermount Kitchen Sink On A Granite Countertop

Undermount Sink Installation Tool Set

3 Simple Ways To Install An Undermount Sink Wikihow

