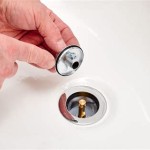
How To Mount Undermount Sink
Undermount sinks are a popular choice for homeowners who want a sleek and modern look in their kitchen. These sinks are mounted below the countertop, which creates a seamless transition and makes it easy to clean around the sink. Installing an undermount sink can be a challenge, but it is a project that can be completed by most do-it-yourselfers with a little planning and preparation.
Before you begin, gather all of the materials and tools you will need. You will need an undermount sink, a mounting kit, a drill, a jigsaw, a caulk gun, and a level. Once you have all of your materials, you can begin the installation process.
Step 1: Prepare the Countertop
The first step is to prepare the countertop for the sink. This involves cutting a hole in the countertop that is the same size as the sink. To do this, you will need to use a jigsaw. Be sure to measure the sink carefully and mark the cutting line on the countertop before you begin cutting.
Step 2: Install the Mounting Brackets
Once the hole is cut, you will need to install the mounting brackets. The mounting brackets will support the sink and keep it in place. To install the mounting brackets, you will need to drill holes in the countertop and then insert the brackets into the holes. Be sure to tighten the screws securely.
Step 3: Apply Caulk
Before you install the sink, you need to apply a bead of caulk around the edge of the hole in the countertop. The caulk will help to seal the sink and prevent water from leaking. Be sure to apply the caulk evenly and smoothly.
Step 4: Install the Sink
Once the caulk is applied, you can install the sink. To do this, you will need to lift the sink into place and then align it with the mounting brackets. Once the sink is in place, you can tighten the screws on the mounting brackets to secure the sink.
Step 5: Connect the Plumbing
Once the sink is installed, you will need to connect the plumbing. This involves connecting the water supply lines to the sink and then connecting the drain line to the drainpipe. Be sure to tighten all of the connections securely.
Step 6: Check for Leaks
Once the plumbing is connected, you will need to check for leaks. To do this, turn on the water supply and then look for any leaks around the sink. If you find any leaks, tighten the connections until the leaks stop.
Step 7: Clean the Sink
Once the sink is installed and checked for leaks, you can clean the sink. To do this, use a mild soap and water solution and a soft cloth. Be sure to rinse the sink thoroughly after cleaning.
Installing an undermount sink can be a rewarding project that can add a touch of style to your kitchen. By following these steps, you can install an undermount sink in your home with ease.

3 Simple Ways To Install An Undermount Sink Wikihow

How To Install An Undermount Kitchen Sink On A Granite Countertop Youtube

3 Simple Ways To Install An Undermount Sink Wikihow

How To Install Undermount Kitchen Sinks Concrete Countertop Institute

How To Install An Undermount Sink

3 Simple Ways To Install An Undermount Sink Wikihow

How Do You Install Undermount Sinks Marble Com

Diy Easy Undermount Sink Install Youtube

How To Install Undermount Kitchen Sinks Concrete Countertop Institute

How To Replace And Install An Undermount Sink Youtube


