How To Refinish a Kitchen Sink
Refinishing a kitchen sink can rejuvenate an aging or damaged fixture, providing a cost-effective alternative to complete replacement. Porcelain, cast iron, and acrylic sinks are common candidates for refinishing, and the process involves cleaning, repairing, and applying a new coating. The success of a refinishing project depends on proper preparation, the selection of appropriate materials, and meticulous application techniques.
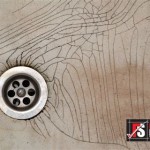
Before embarking on a refinishing project, assessing the suitability of the sink for this process is crucial. Deep cracks that extend through the material, extensive rusting that has compromised structural integrity, or previous refinishing attempts that have failed significantly may indicate that replacement is a more appropriate solution. However, surface scratches, minor chips, and discoloration are generally well-suited for refinishing.
Gathering the necessary materials and tools is the first practical step. This typically includes: a refinishing kit specific to the sink material (porcelain, acrylic, or cast iron), which usually comprises an etching solution, primer, and topcoat; safety glasses; chemical-resistant gloves; a respirator or mask rated for organic vapors; various grades of sandpaper (e.g., 120-grit, 220-grit, 400-grit, and 600-grit); tack cloths; a plastic scraper; a cleaning solution (such as trisodium phosphate – TSP); masking tape; drop cloths or plastic sheeting; a lint-free cloth; and a well-ventilated work area.
Preparation and Safety Measures
Safety is paramount when working with the chemicals involved in sink refinishing. Adequate ventilation is essential to prevent inhalation of harmful fumes. Opening windows and doors, or using a ventilation fan, is crucial. Wearing safety glasses and chemical-resistant gloves protects the eyes and skin from corrosive substances. A respirator or mask rated for organic vapors safeguards the respiratory system. Ensuring that all materials are stored safely and out of reach of children and pets is also important.
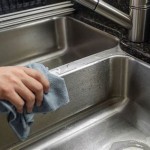
Thorough cleaning is the first step in preparing the sink surface. Remove any existing drain hardware and garbage disposal units. Use a cleaning solution such as TSP to degrease and remove any accumulated grime, soap scum, or hard water stains. Rinse the sink thoroughly with water and allow it to dry completely. Inspect the surface for any loose caulk around the sink edges and remove it with a utility knife or caulk remover. The old caulk needs to be removed to allow the new finish to adhere properly to the sink surface.
Mask off the surrounding surfaces to protect them from overspray. Use masking tape and drop cloths or plastic sheeting to cover countertops, backsplashes, and other nearby areas. Pay close attention to detail, ensuring that the masking is secure and prevents any accidental contact with the refinishing materials.
Repairing any chips or cracks is the next crucial step. Small chips can be filled with a specialized epoxy filler designed for sink repair. Larger cracks may require a more robust epoxy compound or patching material. Clean the damaged area thoroughly and apply the filler according to the manufacturer's instructions. Allow the filler to cure completely, as specified on the product label. Once the filler has cured, carefully sand the repaired area to create a smooth, even surface that blends seamlessly with the surrounding area.
Sanding the entire sink surface is critical for creating a proper bond between the old finish and the new coating. Start with a coarser grit sandpaper (e.g., 120-grit) to remove any existing gloss and create a slightly roughened surface. Gradually move to finer grits (e.g., 220-grit, 400-grit, and 600-grit) to smooth out the surface and eliminate any visible scratches. The goal is to create a uniformly smooth and slightly textured surface that will promote optimal adhesion of the primer and topcoat. After each sanding step, thoroughly remove sanding dust with a tack cloth.
Etching the sink surface is often required, particularly for porcelain and cast iron sinks. Etching solutions contain acidic compounds that create microscopic pores on the surface, further enhancing adhesion. Apply the etching solution according to the manufacturer's instructions, ensuring that it is evenly distributed across the entire sink surface. Allow the solution to dwell for the recommended time, and then thoroughly rinse the sink with water. Allow the sink to dry completely before proceeding to the next step.
Applying the Primer and Topcoat
Applying a primer coat is essential for creating a uniform base and promoting adhesion of the topcoat. Select a primer that is specifically designed for sink refinishing and compatible with the topcoat being used. Apply the primer in thin, even coats, using a brush, roller, or spray gun, depending on the manufacturer's recommendations. Allow each coat to dry completely before applying the next, as specified on the product label. Typically, two coats of primer are recommended for optimal coverage and adhesion.
Before applying the topcoat, inspect the primed surface for any imperfections, such as drips, runs, or uneven areas. If necessary, lightly sand these imperfections with fine-grit sandpaper (e.g., 400-grit) and remove the sanding dust with a tack cloth. This will ensure a smooth and flawless finish.
The application of the topcoat is the final step in the refinishing process. Select a topcoat that is specifically designed for sink refinishing and compatible with the sink material and primer being used. Apply the topcoat in thin, even coats, using a brush, roller, or spray gun, depending on the manufacturer's recommendations. Overlapping each pass slightly ensures complete coverage. Avoid applying the topcoat too thickly, as this can lead to runs, drips, or uneven drying. Allow each coat to dry completely before applying the next, as specified on the product label. Typically, two to three coats of topcoat are recommended for optimal durability and gloss.
When using a spray gun, maintain a consistent distance and angle from the sink surface to ensure a uniform application. Practice on a scrap piece of material before spraying the sink to familiarize with the spray pattern and adjust the spray gun settings accordingly. Overlap each pass by approximately 50% to prevent streaking.
If using a brush or roller, choose high-quality applicators that are designed for use with the specific type of topcoat being applied. Avoid using low-quality brushes or rollers, as these can leave behind bristles or lint that can compromise the finish. Apply the topcoat in long, smooth strokes, following the contours of the sink. Avoid applying too much pressure, as this can create brush marks or roller stipple.
Curing and Post-Refinishing Care
Allow the topcoat to cure completely before using the sink. The curing time will vary depending on the type of topcoat used and the ambient temperature and humidity. Refer to the manufacturer's instructions for specific curing times. Avoid placing any items in the sink or exposing it to water during the curing process.
Once the topcoat has fully cured, carefully remove the masking tape and drop cloths. Inspect the finished surface for any imperfections, such as runs, drips, or uneven areas. If necessary, these imperfections can be carefully sanded with ultra-fine-grit sandpaper (e.g., 1000-grit or higher) and buffed to a smooth finish. However, excessive sanding can damage the topcoat, so proceed with caution.
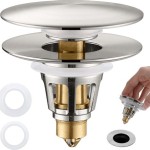
Reinstall the drain hardware and garbage disposal unit, ensuring that all connections are secure and leak-proof. Apply a bead of caulk around the sink edges to create a watertight seal. Select a caulk that is specifically designed for kitchen and bathroom applications and resistant to mold and mildew growth.
To maintain the refinished sink and prolong its lifespan, follow these recommendations: Avoid using abrasive cleaners, scouring pads, or harsh chemicals, as these can scratch or damage the topcoat. Clean the sink regularly with mild soap and water, using a soft sponge or cloth. Avoid leaving standing water in the sink, as this can lead to water spots or staining. Avoid placing heavy or sharp objects in the sink, as these can chip or scratch the finish. Consider using a sink grid or mat to protect the bottom of the sink from scratches and dents. Promptly repair any chips or scratches to prevent further damage and maintain the integrity of the refinished surface.
Refinishing a kitchen sink requires careful preparation, attention to detail, and the use of appropriate materials. By following these instructions, one can achieve a professional-looking finish that extends the life of the sink and enhances the appearance of the kitchen.

Sink Refinishing Specialized Co

How To Repair And Refinish Your Kitchen Sink Reglazing For 195 Dp Tubs Youtube

How To Repair And Reglaze A Kitchen Sink Using Diy Krylon Tub Tile Kit Youtube

Sink Refinishing Mission Hills Ca

Sink Refinishing And Restoration Ace Perma Glaze

Sink Refinishing Mission Hills Ca

How To Repair And Reglaze A Kitchen Sink Using Diy Krylon Tub Tile Kit Youtube

Bathtub Refinishing And Fiberglass Expert Sink Reglazing

How To Care For A Refinished Cast Iron Sink Modern Homesteading Stylish Self Sufficient Living City Country And Life Blog Moving

How To Paint A Kitchen Sink Homax Tough As Tile Review Youtube


