How To Remove A Bathroom Sink Faucet
A bathroom faucet may need to be removed for replacement due to leaks, damage, or a desire to upgrade to a new style. Removing a bathroom sink faucet is a relatively simple task that can be completed in a few steps.
Before starting, it's important to gather the necessary tools and materials:
- Adjustable wrench
- Basin wrench
- Plumber's putty
- New faucet (if replacing)
- Bucket or bowl to catch water
With the tools and materials ready, follow these steps to remove the bathroom sink faucet:
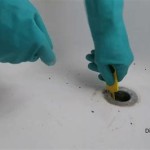
- Turn Off the Water Supply: Locate the shut-off valves beneath the sink and turn them off to stop the flow of water. If there are no shut-off valves, you will need to turn off the main water supply to your home.
- Open the Faucet: Turn on the faucet to release any remaining water in the lines and allow it to drain into the bucket or bowl.
- Disconnect the Supply Lines: Use the adjustable wrench to loosen the nuts connecting the water supply lines to the faucet. Be careful not to overtighten as this could damage the lines.
- Remove the Faucet Aerator: If your faucet has an aerator, use a small wrench or your fingers to remove it. This will provide access to the mounting nuts.
- Loosen the Mounting Nuts: Using a basin wrench, loosen the mounting nuts that are holding the faucet in place. These nuts are usually located beneath the sink.
- Remove the Faucet: Once the mounting nuts are loose, carefully lift the faucet straight up and out of the sink.
Once the old faucet is removed, you can install the new one by following these steps in reverse order:
- Apply Plumber's Putty: Apply a bead of plumber's putty around the base of the new faucet.
- Insert the Faucet: Carefully insert the new faucet into the sink hole and tighten the mounting nuts using a basin wrench.
- Connect the Supply Lines: Hand-tighten the nuts connecting the water supply lines to the faucet. Use the adjustable wrench to further tighten them, but avoid overtightening.
- Install the Faucet Aerator: Screw the aerator back onto the faucet.
- Turn on the Water Supply: Slowly turn on the shut-off valves or main water supply and check for any leaks. If there are leaks, tighten the connections further.
By following these steps carefully, you can successfully remove and replace a bathroom sink faucet. Remember to work slowly and carefully to avoid any damage to your sink or plumbing.

How To Replace A Bathroom Faucet Home Repair Tutor

How To Remove And Install A Bathroom Faucet

How To Remove And Install A Bathroom Faucet

Replacing A Bathroom Faucet Fine Homebuilding

How To Replace A Bathroom Faucet Home Repair Tutor

How To Replace A Bathroom Faucet Tinged Blue

How Do I Replace Bathroom Sink Faucet Handles Cleaning More Youtube

How Do I Replace Bathroom Sink Faucet Handles Cleaning More Youtube

Installing A New Bathroom Faucet

How To Remove And Install A Bathroom Faucet