How To Remove A Drain From A Bathroom Sink
Bathroom sink drains can get clogged up over time with hair, soap scum, and other debris. If you're experiencing slow drainage or a complete clog, you may need to remove the drain to clean it. Here's a step-by-step guide on how to remove a bathroom sink drain.
Tools and materials you'll need:
- Adjustable wrench
- Plunger
- Drain snake
- Bucket
- Old towels or rags
Step 1: Turn off the water supply
Before you start working on the drain, turn off the water supply to the sink. You'll find the shut-off valves underneath the sink. Turn both the hot and cold water valves clockwise to close them.
Step 2: Remove the drain stopper
If your sink has a drain stopper, you'll need to remove it before you can access the drain. Most drain stoppers are held in place by a screw or a nut. Use a screwdriver or wrench to loosen the screw or nut and remove the drain stopper.
Step 3: Remove the drain strainer
Once the drain stopper is removed, you'll see the drain strainer. The drain strainer is a metal or plastic grate that catches hair and other debris. Use a pair of pliers to grip the drain strainer and pull it up and out of the drain.
Step 4: Loosen the drain nut
The drain nut is a large nut that holds the drain in place. It's usually located at the bottom of the drain assembly. Use an adjustable wrench to loosen the drain nut. Turn the wrench counterclockwise to loosen the nut.
Step 5: Remove the drain assembly
Once the drain nut is loosened, you can remove the drain assembly. Grip the drain assembly with your hand and pull it up and out of the sink. Be careful not to drop the drain assembly into the drain pipe.
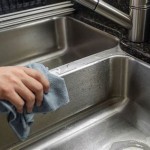
Step 6: Clean the drain assembly
Once the drain assembly is removed, you can clean it. Use a brush or a rag to remove any hair, soap scum, or other debris from the drain assembly. If the drain assembly is heavily clogged, you may need to use a drain snake to clear the clog.
Step 7: Reassemble the drain
Once the drain assembly is clean, you can reassemble the drain. Start by inserting the drain assembly into the drain pipe. Then, tighten the drain nut by turning it clockwise with an adjustable wrench. Finally, replace the drain strainer and the drain stopper.
Step 8: Turn on the water supply and check for leaks
Once the drain is reassembled, turn on the water supply and check for leaks. If there are any leaks, tighten the drain nut further. If the leak persists, you may need to replace the drain assembly.

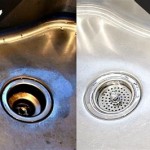
How To Replace A Rusty Sink Drain Howtolou Com

How To Remove A Sink Stopper The Home

Plumbing How Do I Remove The Sink Drain In This Situation Home Improvement Stack Exchange

How To Remove A Bathroom Sink Stopper Take Out Pop Up Drain From

How To Remove A Sink Stopper The Home

5 Natural Ways To Unclog A Bathroom Sink Hiller How

How To Fix A Bathroom Sink Stopper This Old House Youtube

3 Ways To Clean A Bathroom Sink Drain Wikihow

How To Replace A Bathroom Sink Drain Youtube

Plumbing How To Replace Sink Drain Stopper Home Improvement Stack Exchange