How to Repair a Leak Under the Sink
A leak under the sink can be a major headache, but it's one that you can usually fix yourself with a few simple tools and a little bit of time. Here's a step-by-step guide to help you repair a leak under the sink:
Step 1: Turn Off the Water Supply
The first step is to turn off the water supply to the sink. There will usually be two shut-off valves under the sink, one for hot water and one for cold water. Turn both valves clockwise to turn off the water.
Step 2: Locate the Leak
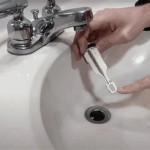
Once the water is turned off, you need to locate the leak. Check all of the pipes and fittings under the sink for any signs of water damage or dripping water. Once you've found the leak, you can start to repair it.
Step 3: Tighten Loose Fittings
If the leak is coming from a loose fitting, you can simply tighten it with a wrench. Be careful not to overtighten the fitting, as this could damage the pipe.
Step 4: Replace Worn Washers
If the leak is coming from a worn washer, you will need to replace it. Washers are small, rubber or metal disks that create a watertight seal between two pipes or fittings. To replace a washer, simply remove the old washer and replace it with a new one.
Step 5: Repair Cracked Pipes
If the leak is coming from a cracked pipe, you will need to repair or replace the pipe. To repair a cracked pipe, you can use a pipe repair clamp. Pipe repair clamps are available at most hardware stores.
Step 6: Turn the Water Supply Back On
Once you have repaired the leak, you can turn the water supply back on. Slowly turn on both valves, and check for any leaks. If there are no leaks, then you have successfully repaired the leak under the sink.
Tips
Here are a few tips to help you repair a leak under the sink:
- If you are not comfortable working with plumbing, it is best to call a plumber.
- Before you start working on the leak, make sure that you have all of the necessary tools and materials.
- Be careful not to overtighten fittings, as this could damage the pipe.
- If you are replacing a washer, make sure that the new washer is the same size and type as the old washer.
- If you are repairing a cracked pipe, make sure that the pipe repair clamp is the correct size for the pipe.
4 Simple Ways To Fix A Leaky Sink Drain Pipe Wikihow
How To Replace A Kitchen Sink Drain Strainer Repair Leak
4 Simple Ways To Fix A Leaky Sink Drain Pipe Wikihow
How To Repair A Leaking Sink Trap
Leak Under Sink In Kitchen 6 Most Likely Causes
Easy Kitchen Sink Leak Repair Youtube
4 Simple Ways To Fix A Leaky Sink Drain Pipe Wikihow
How To Fix Or Replace A Leaky Sink Trap Hometips
Leaky Sink Basket Strainer How To Fix The Most Common Leak Youtube
4 Ways To Fix A Bathroom Sink Leaking Underneath 1 Tom Plumber