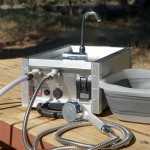
How to Replace a Kitchen Sink
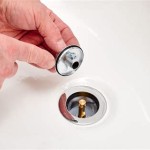
Replacing a kitchen sink is a relatively easy DIY project that can be completed in a few hours. By following these step-by-step instructions, homeowners can save money and update the look of their kitchen. ### Step 1: Gather Tools and Materials Before starting the project, gather the necessary tools and materials: * New kitchen sink * Adjustable wrench * Screwdriver * Pliers * Hacksaw or PVC cutter * Measuring tape * Level * Pencil * Silicone caulk * Plumbers putty (optional) ### Step 2: Remove the Old Sink 1. Turn off the water supply valves under the sink. 2. Disconnect the water supply lines from the faucets. 3. Disconnect the drain line from the P-trap. 4. Remove the mounting brackets or screws that secure the sink to the countertop. 5. Carefully lift the old sink out of the cabinet opening. ### Step 3: Prepare the Countertop 1. Clean the countertop surface where the new sink will be installed. 2. Apply a bead of silicone caulk around the perimeter of the sink opening. 3. If using plumbers putty, roll a rope of putty and place it around the drain opening on the underside of the sink. ### Step 4: Install the New Sink 1. Carefully lower the new sink into the opening. 2. Align the sink with the countertop and make sure it is level. 3. Secure the sink to the countertop using the mounting brackets or screws. 4. Reconnect the drain line to the P-trap. 5. Reconnect the water supply lines to the faucets. ### Step 5: Tighten the Connections 1. Tighten the mounting brackets or screws that secure the sink to the countertop. 2. Tighten the nuts on the water supply lines using an adjustable wrench. 3. Hand-tighten the drain line to the P-trap. ### Step 6: Test for Leaks 1. Turn on the water supply valves slowly. 2. Inspect the connections for leaks. 3. If there are any leaks, tighten the connections further or apply additional silicone caulk. ### Step 7: Caulk Around the Sink 1. Apply a bead of silicone caulk around the perimeter of the sink, where it meets the countertop. 2. Smooth the caulk with your finger or a caulk tool. 3. Allow the caulk to dry completely before using the sink.
How To Upgrade Your Kitchen Sink At Home With Ashley

Upgrade Your Kitchen Sink Diy Replacement

How To Replace A Kitchen Sink The Home

How To Replace A Kitchen Sink The Home

How To Replace A Tiled In Kitchen Sink Without Damaging Tile

How To Change Kitchen Sink Tapron Uk

How To Replace The Kitchen Sink Plumber Sydney

How To Replace And Install An Undermount Sink

How To Change A Kitchen Faucet Family Handyman

How To Change A Kitchen Tap Bathroom Ideas Easy And Quick