How To Replace Kitchen Sink Drain
Replacing a kitchen sink drain is a relatively simple plumbing repair that can be completed in a few hours. By following the steps below, you can replace your kitchen sink drain without the need to call a plumber.
Step 1: Gather Your Materials
Before you begin, you will need to gather the following materials:
- New drain assembly
- Adjustable wrench
- Pliers
- Bucket
- Rags
- Caulk gun
- Caulk
Step 2: Turn Off the Water Supply
Once you have gathered your materials, the first step is to turn off the water supply to your sink. To do this, locate the shut-off valves beneath the sink and turn them clockwise until they are completely closed.
Step 3: Disconnect the Drain Line
Next, you will need to disconnect the drain line from the drain assembly. To do this, use an adjustable wrench to loosen the nuts that connect the drain line to the assembly. Once the nuts are loose, you can pull the drain line free from the assembly.
Step 4: Remove the Old Drain Assembly
With the drain line disconnected, you can now remove the old drain assembly. To do this, first use a screwdriver to remove the screws that hold the assembly in place. Once the screws are removed, you can pull the assembly free from the sink.
Step 5: Clean the Sink Opening
Once the old drain assembly is removed, you will need to clean the sink opening. To do this, use a sponge or rag to wipe away any debris or gunk that has accumulated around the opening.
Step 6: Apply Caulk
Before installing the new drain assembly, you will need to apply a bead of caulk around the edge of the sink opening. This will help to create a watertight seal and prevent leaks.
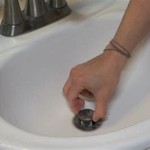
Step 7: Install the New Drain Assembly
With the caulk in place, you can now install the new drain assembly. To do this, first insert the assembly into the sink opening. Then, use the screws to secure the assembly in place. Finally, tighten the nuts that connect the drain line to the assembly.
Step 8: Turn On the Water Supply
Once the new drain assembly is installed, you can turn on the water supply to your sink. To do this, simply turn the shut-off valves counterclockwise until they are fully open.
Step 9: Check for Leaks
Finally, check for leaks around the drain assembly. If you see any leaks, tighten the nuts that connect the drain line to the assembly until the leaks stop.
Conclusion
Replacing a kitchen sink drain is a simple plumbing repair that can be completed in a few hours. By following the steps above, you can replace your kitchen sink drain without the need to call a plumber.

How To Replace A Kitchen Sink Strainer

How To Replace A Kitchen Sink Basket Strainer Diy Family Handyman

Kitchen Sink Strainer Fail No Clue What Happened Youtube

How To Install A Kitchen Sink Drain

How To Install Kitchen Sink Drain Strainer Stop Leaks

How To Install A Kitchen Sink Drain

How To Replace A Kitchen Sink Strainer Hard Remove Old Parts Youtube

How To Remove A Kitchen Sink Drain 13 Steps With Pictures

How To Install A Kitchen Sink Drain With Pictures Wikihow

How To Replace A Kitchen Sink Drain Strainer Repair Leak