How To Seal A Kitchen Sink
A leaky kitchen sink is a common plumbing problem that can be easily fixed with a few simple tools and materials. By following these steps, you can seal your kitchen sink and prevent leaks from happening in the future.
1. Gather Your Materials
To seal a kitchen sink, you will need the following materials:
- Plumber's putty
- Putty knife
- Caulk gun
- Caulk
- Mineral spirits (optional)
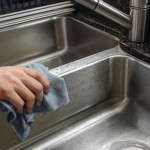
2. Clean The Sink
Before you begin sealing the sink, it is important to clean it thoroughly. Remove any old caulk or putty from the sink and countertop. Clean the sink with a degreaser or mineral spirits to remove any dirt or grease. Allow the sink to dry completely before proceeding.
3. Apply Plumber's Putty
Plumber's putty is a pliable material that is used to seal the drain flange to the sink. To apply plumber's putty, simply roll it into a rope and place it around the base of the drain flange. Press the putty firmly into place and smooth it out with your finger or a putty knife.
4. Install The Drain Flange
Once the plumber's putty is in place, you can install the drain flange. Align the flange with the drain hole and press it down firmly. Tighten the flange bolts until they are snug.
5. Apply Caulk
Caulk is a flexible sealant that is used to fill in gaps and prevent leaks. To apply caulk, load a caulk gun with a tube of caulk. Cut the tip of the tube at a 45-degree angle and insert it into the caulk gun. Apply a bead of caulk around the perimeter of the sink where it meets the countertop. Smooth out the caulk with your finger or a putty knife.
6. Allow The Sealant To Cure
Once you have applied the caulk, allow it to cure completely before using the sink. The curing time will vary depending on the type of caulk that you use. Check the manufacturer's instructions for the specific curing time.
7. Test The Seal
Once the sealant has cured, you can test the seal by filling the sink with water. Turn on the faucet and check for any leaks. If you see any leaks, you can apply more caulk to the affected area.
By following these steps, you can seal your kitchen sink and prevent leaks from happening in the future. This is a simple and inexpensive repair that can save you a lot of time and money in the long run.

Fitting A Kitchen Sink Sealing The Carpenter S Daughter

Sealing In The Kitchen

How To Apply Sealant Around A Kitchen Sink For Just Rm30 Usd7 22 Youtube

Fitting A Kitchen Sink Sealing The Carpenter S Daughter

Diy Remove Caulk And Replace In Kitchen Sink Dap Global

How To Silicone Mastic Around A Sink Youtube

Fitting A Kitchen Sink Sealing The Carpenter S Daughter

How To Apply Silicone Caulk Kitchen Sink Easy Steps For A Leak Fr Direct

Fitting A Kitchen Sink Sealing The Carpenter S Daughter

Seal Around Sink And Hob Lowvelder