Install Kitchen Sink Mounting Clips
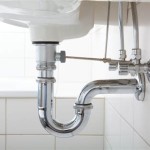
Kitchen sink mounting clips are essential for keeping your sink securely in place. They are typically made of metal and are attached to the underside of the sink. The clips then hook onto the lip of the countertop, holding the sink in place.
Installing kitchen sink mounting clips is a relatively simple task that can be completed in a few minutes. However, it is important to follow the instructions carefully to ensure that the clips are installed correctly.
Here are the steps on how to install kitchen sink mounting clips:
- Gather your materials. You will need the following materials to install kitchen sink mounting clips:
- Kitchen sink mounting clips
- Screwdriver
- Drill (optional)
- Safety glasses
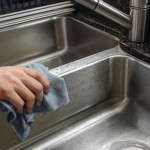
- Prepare the sink. Before you can install the mounting clips, you need to prepare the sink. This involves cleaning the underside of the sink and removing any debris that may be present.
- Mark the location of the mounting clips. Once the sink is prepared, you need to mark the location of the mounting clips. The clips should be spaced evenly around the perimeter of the sink. To mark the location of the clips, simply hold the clip in place and mark the holes with a pencil.
- Drill pilot holes (optional). If you are installing the mounting clips into a hard surface, such as granite or quartz, you may need to drill pilot holes. To do this, simply use a drill bit that is the same size as the screws that will be used to secure the clips.
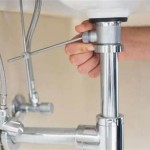
- Install the mounting clips. Once the pilot holes have been drilled (if necessary), you can now install the mounting clips. To do this, simply insert the screws into the holes and tighten them until the clips are securely in place.
- Attach the sink to the countertop. Once the mounting clips are installed, you can now attach the sink to the countertop. To do this, simply lift the sink into place and hook the clips onto the lip of the countertop.
- Secure the sink. Once the sink is in place, you need to secure it to the countertop. To do this, simply tighten the screws that are located on the underside of the sink.
Once the sink is secured, you can now use it as normal. Be sure to clean the sink regularly to prevent the build-up of dirt and grime.

Diy Installation Guide For Stainless Steel Drop In Sinks

Installing A Steel Queen Stainless Kitchen Sink

How To Install A Stainless Steel Drop In Sink Moen Installation

Installing Undermount Sink Clips Granite Quartz Countertop

Surface Mount Clip Set For Kitchen Sinks Sink Installation Aluids

How To Install A Kitchen Sink In 10 Easy Steps

Sink Mounting Clips

Ge23321mr2 By Elkay Dayton Stainless Steel 33 X 21 1 4 5 3 8 Mr2 Hole Equal Double Bowl Drop In Sink Studio41

10x Undermount Sink Clips Kitchen Installation Repair Hardware Clip

Sink Clips Installation Id 7124097 Details View From Clipsko Ec21 Mobile