```html
Mobile Home Bathroom Sink Replacement: A Comprehensive Guide
Replacing a bathroom sink in a mobile home requires careful planning and execution. Mobile home plumbing systems can differ significantly from those in traditional houses, necessitating a specific approach to avoid potential issues. This article provides a comprehensive guide to successfully replacing a bathroom sink in a mobile home, covering essential considerations, necessary tools, step-by-step instructions, and troubleshooting tips.
Before commencing any sink replacement project, it's crucial to understand the unique characteristics of mobile home plumbing. Unlike conventional homes with rigid copper or PVC pipes, mobile homes frequently utilize flexible polyethylene (PEX) or polybutylene (PB) pipes, often with specialized fittings. Attempts to connect standard plumbing fixtures directly to these systems can lead to leaks and damage. Furthermore, space constraints within a mobile home bathroom often necessitate careful selection of a replacement sink that fits the existing footprint.
Improperly installed plumbing can lead to water damage, mold growth, and costly repairs. Therefore, understanding the intricacies of the plumbing system is paramount. Prior to undertaking the sink replacement, it is advisable to consult local regulations regarding plumbing work in mobile homes. In some jurisdictions, a licensed plumber may be required to perform certain aspects of the installation.
Key Point 1: Preparing for the Sink Replacement
Proper preparation is essential for a smooth and efficient sink replacement process. This involves gathering the necessary tools and materials, turning off the water supply, and taking detailed measurements to ensure the new sink is compatible with the existing plumbing and cabinet space.
The required tools typically include: adjustable wrench, basin wrench (also known as a sink wrench), pipe wrench, screwdriver set (Phillips and flathead), putty knife or scraper, pliers, bucket, towels, safety glasses, and work gloves. It may also be necessary to have a hacksaw or pipe cutter for modifying drain pipes.
Material requirements include the new bathroom sink, plumber's putty or silicone sealant, Teflon tape, new supply lines (if the old ones are corroded or damaged), and any necessary adapters or fittings to connect the new sink drain to the existing drainpipe. Ensure that all materials comply with local plumbing codes and are compatible with the existing mobile home plumbing system.
The first step is to shut off the water supply to the bathroom. Locate the shut-off valves under the sink, if present. If these valves are not available or are malfunctioning, the main water shut-off valve for the mobile home will need to be closed. After shutting off the water, turn on the faucet to relieve any pressure in the pipes. Place a bucket under the sink to catch any residual water.
Next, carefully inspect the existing plumbing connections. Note the type of pipes, fittings, and drain connections. Take detailed measurements of the existing sink and cabinet opening to ensure that the new sink will fit properly. Pay particular attention to the location of the drain opening and faucet holes. It might also be helpful to take photographs of the existing plumbing setup for reference during the reinstallation process.
Key Point 2: Removing the Old Sink
The careful removal of the old sink is crucial to avoid damaging the surrounding cabinetry and plumbing. This process involves disconnecting the water supply lines, detaching the drain assembly, and separating the sink from the countertop or vanity.
Begin by disconnecting the water supply lines from the faucet. Use an adjustable wrench to loosen the connections, working carefully to avoid damaging the pipes. Some older supply lines might be corroded or stuck, requiring the use of penetrating oil or a pipe wrench. Consider replacing the supply lines with new ones for optimal performance and leak prevention. Place the bucket under the connections to catch any remaining water in the lines.
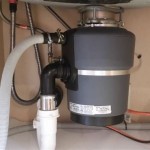
Next, detach the drain assembly. Loosen the slip nuts connecting the P-trap to the sink drain and the drainpipe. A basin wrench can be helpful for reaching tight spaces. Once the slip nuts are loosened, carefully remove the P-trap and drainpipe extensions. Be prepared for residual water in the P-trap.
With the plumbing disconnected, the sink can be separated from the countertop or vanity. Depending on the type of sink, it may be held in place by clips, screws, or adhesive. Undermount sinks are typically attached with clips and adhesive, while drop-in sinks may be secured with screws or caulk. Carefully remove any fasteners and use a putty knife or scraper to gently break the seal between the sink and the countertop. Lift the old sink out of the opening and set it aside. Be mindful of its weight, as some sinks can be quite heavy.
After removing the old sink, thoroughly clean the countertop or vanity surface. Remove any old caulk, adhesive, or plumber's putty using a scraper and a suitable solvent. Ensure the surface is clean, dry, and smooth before installing the new sink.
Key Point 3: Installing the New Sink
Installing the new sink requires careful attention to detail to ensure a watertight seal and proper plumbing connections. This involves applying sealant, positioning the sink, connecting the drain assembly, and attaching the water supply lines.
Before installing the sink, apply a bead of plumber's putty or silicone sealant around the rim of the sink opening on the countertop or vanity. The type of sealant used will depend on the type of sink and the countertop material. Follow the manufacturer's instructions for the recommended sealant and application method. For undermount sinks, apply sealant to the underside of the countertop where the sink will be attached.
Carefully position the new sink in the opening, ensuring that it is centered and aligned properly. Press down firmly to create a good seal between the sink and the countertop. If the sink is secured with clips or screws, tighten them evenly to distribute the pressure and prevent cracking. Wipe away any excess sealant with a damp cloth.
Next, install the new drain assembly. Apply Teflon tape to the threads of the drainpipe connections. Insert the drain flange into the sink drain opening and secure it with the rubber gasket, washer, and locknut. Tighten the locknut securely using a basin wrench, but avoid overtightening. Attach the P-trap and drainpipe extensions, ensuring that all slip nuts are tightened properly. Check for leaks by running water into the sink.
Finally, connect the water supply lines to the faucet. Apply Teflon tape to the threads of the faucet connections. Attach the supply lines to the faucet and tighten the connections with an adjustable wrench. Avoid overtightening, as this can damage the fittings. Turn on the water supply slowly and check for leaks at all connections. If any leaks are detected, tighten the connections further or replace the Teflon tape. Allow the sealant around the sink rim to cure according to the manufacturer's instructions before using the sink.
After the installation is complete, inspect all connections for leaks. Run water into the sink and observe the drain flow. Ensure that the water drains freely and that there are no signs of leaks or drips. If any issues are detected, troubleshoot the connections and make necessary adjustments to ensure a watertight seal and proper drainage. Regularly inspect the plumbing connections for leaks as part of routine mobile home maintenance.
Replacing a bathroom sink in a mobile home can be a manageable DIY project with careful planning and attention to detail. By understanding the unique characteristics of mobile home plumbing systems, gathering the necessary tools and materials, and following a step-by-step approach, a functional and aesthetically pleasing bathroom sink replacement can be achieved.
```
Update A Mobile Home Bathroom Vanity

Removing Bathroom Cabinet And Sink In Manufactured Home Doityourself Com Community Forums

Update A Mobile Home Bathroom Vanity

Mobile Home Plumbing And Repair Parts Danco

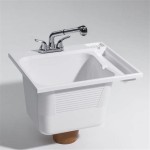
Rectangular Plastic Bathroom Sink 17 X 20

Mobile Home Bathroom Guide Living

Update A Mobile Home Bathroom Vanity

Bathroom Lavatory Faucet For Mobile Home Manufactured Housing

Sink Repair Options Mobile Home Diy Bathroom Leaky Cracked

Kitchen And Bathroom Sinks M L Mobile Home Supply
