Paint for Tubs and Sinks: A Guide to Refinishing Your Bathroom Fixtures
Upgrading the look of your bathroom doesn't always require a complete remodel. A fresh coat of paint on your tub and sink can dramatically transform the space, giving it a new lease on life. Whether you're covering up chips and scratches or simply want to change the color, painting your bathroom fixtures is a cost-effective and DIY-friendly solution.
Choosing the Right Paint
Not all paints are created equal when it comes to refinishing bathroom fixtures. You'll need to select a specialized paint designed to adhere to the slick surface of your tub or sink. Look for paints labeled specifically for "bathtubs and sinks" or "ceramic and porcelain." These paints typically have a higher concentration of epoxy resins, which provide better adhesion and durability.
Surface Preparation
Before you start painting, it's crucial to properly prepare the surface of your fixtures. This will ensure that the paint bonds securely and lasts for years to come.
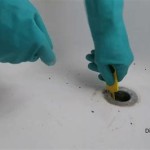
- Clean the Surface: Use a degreaser or trisodium phosphate (TSP) solution to remove dirt, oil, and soap scum from the surface. Rinse thoroughly and allow it to dry.
- Sand Lightly: Using fine-grit sandpaper (120-grit or higher), lightly sand the surface to create a slightly rough texture. This will help the paint adhere better.
- Rinse and Dry: Rinse the surface again to remove any sanding dust and allow it to dry completely.
Applying the Paint
Follow the manufacturer's instructions carefully when applying the paint.
- Use a Primer: Some paints require a primer to enhance adhesion. Apply a thin coat of primer if recommended by the manufacturer.
- Apply Thin Coats: Use a brush or roller to apply thin, even coats of the paint. Avoid applying thick layers, as they may not dry properly and could peel or chip.
- Multiple Coats: Allow each coat to dry completely before applying the next one. Most paints require at least two coats for optimal coverage and durability.
Curing Time
After the final coat of paint has been applied, allow ample time for it to cure before using the tub or sink. This can take several days, depending on the type of paint used. Refer to the manufacturer's instructions for specific curing time recommendations.
Tips for Success
* Use a high-quality brush or roller for a smooth finish. * Ventilate the area well while painting and curing. * Allow the paint to cure thoroughly before using the fixtures. * Avoid using harsh cleaning agents on the painted surface. * Recoat the surface every few years to maintain its appearance and durability.
Super Simple How To Paint A Bathtub Youtube

Rust Oleum Tub Tile Paint For Tubs Sink Acrylic Diamond Tool

Specialty Tub Tile Aerosol Page

How To Paint A Tub With Rustoleum What Not Do

How To Paint A Ceramic Tub Or Sink Anderson Lumber

Homax Tough As Tile 28 Oz White Tub Sink And Epoxy 3158 The Home

Rust Oleum Specialty 12 Oz Gloss White Tub And Tile Refinishing Spray Paint 6 Pack 280882 The Home

How To Paint A Sink It All Started With

Easy Tub And Tile Spray Paint Bathtub Refinishing Porcelain Fiberglass

How To Paint A Sink Diy Bathroom Project Your Budget Will Love