Removing a Bathroom Sink Drain: A Comprehensive Guide
Removing a bathroom sink drain is a common plumbing task frequently undertaken for various reasons, including replacing a corroded or damaged drain, upgrading to a new sink faucet, or addressing persistent clogs that cannot be resolved through conventional drain cleaning methods. While seemingly straightforward, this process requires careful attention to detail and a methodical approach to prevent damage to plumbing fixtures and ensure a watertight seal upon reinstallation. This article provides a comprehensive guide to safely and effectively removing a bathroom sink drain, covering necessary tools, step-by-step instructions, and potential challenges.
Prior to commencing any plumbing work, safety must be paramount. It is crucial to shut off the water supply to the bathroom sink. Typically, shut-off valves are located beneath the sink, connected to the supply lines. Turn these valves clockwise until they are completely closed. After shutting off the water supply, turn on the faucet to relieve any residual pressure within the pipes. Place a bucket or basin underneath the drain assembly to catch any remaining water that may be present in the drainpipe. Having these preparations in place will minimize mess and prevent potential water damage to the surrounding area.
Proper ventilation is also essential during this process. Plumbing fixtures may contain accumulated debris and bacteria, making fresh airflow important to prevent allergic reactions stemming from contaminants present in the drainpipes. Wearing safety glasses to prevent debris from irritating the eyes as well as wearing protective gloves to avoid direct contact with potentially harmful residue is recommended. By prioritizing safety and preparation, individuals can undertake this task with confidence and minimize the risk of accidents or injuries.
Essential Tools and Materials
Successfully removing a bathroom sink drain necessitates the use of specific tools and materials. Having these readily available will streamline the process and prevent unnecessary delays. The following list outlines the essential items required:
*Basin Wrench:
A basin wrench, also known as a sink wrench, is an essential tool for loosening and tightening nuts in hard-to-reach places, particularly the drain nut located beneath the sink. Its long handle and pivoting jaw allow access to tight spaces and provide leverage for loosening stubborn connections. *Adjustable Pliers:
Adjustable pliers are useful for gripping and turning various components of the drain assembly, such as the drain flange or the tailpiece. They provide a secure grip and allow for precise adjustments. *Channel-Lock Pliers:
Channel-lock pliers, with their adjustable jaws, offer increased gripping power and are particularly useful for loosening larger nuts or fittings that may be corroded or tightly secured. *Screwdrivers (Phillips and Flathead):
Screwdrivers are necessary for removing any screws that may be holding the drain flange in place or securing other components of the drain assembly. It's important to have both Phillips and flathead screwdrivers to accommodate different screw types. *Putty Knife or Utility Knife:
A putty knife or utility knife is useful for separating the drain flange from the sink basin. Over time, caulk or plumbers putty can create a strong bond. The knife can carefully break this bond without damaging the sink. *Clean Rags:
Clean rags are essential for wiping away excess water, debris, or plumbers putty. They also help to keep the work area clean and prevent slips. *Plumbers Putty:
Plumbers putty is a pliable, waterproof compound used to create a watertight seal between the drain flange and the sink basin. It helps to prevent leaks and ensures a reliable connection. *Penetrating Oil:
Penetrating oil can be helpful for loosening corroded or stuck nuts and bolts. Applying penetrating oil and allowing it to soak for a few minutes can make it easier to remove stubborn connections. *Bucket or Basin:
A bucket or basin is necessary to catch any excess water that may be present in the drainpipe during removal. *Safety Glasses and Gloves:
Safety glasses and gloves are essential for protecting the eyes and hands from debris, bacteria, and potentially harmful substances.Step-by-Step Removal Process
With the necessary tools and materials gathered, the process of removing the bathroom sink drain can proceed methodically. It is recommended to follow these steps carefully to minimize the risk of damage and ensure a successful outcome.
Step 1: Disconnecting the P-Trap:
The P-trap is the curved section of pipe located beneath the sink that traps debris and prevents sewer gases from entering the bathroom. The P-trap must be disconnected prior to removing the drain assembly. Loosen the slip nuts that connect the P-trap to the tailpiece (the vertical pipe extending from the drain) and the drainpipe. Be prepared for water to spill out when disconnecting the P-trap, so have a bucket or basin positioned underneath. Carefully remove the P-trap and set it aside.
Step 2: Loosening the Drain Nut:
The drain nut secures the drain assembly to the sink basin. This nut is typically located beneath the sink, directly under the drain flange. Use a basin wrench to loosen the drain nut. The basin wrench's pivoting jaw allows access to the nut in the confined space. If the nut is particularly tight or corroded, apply penetrating oil and allow it to soak for a few minutes before attempting to loosen it again. Turning the basin wrench counterclockwise will loosen the nut.
Step 3: Removing the Drain Flange:
Once the drain nut is loosened, carefully unscrew it completely. The drain flange, which is the visible part of the drain in the sink, should now be loose. Use a putty knife or utility knife to gently break the seal between the drain flange and the sink basin. Carefully insert the knife between the flange and the sink and work your way around the perimeter to separate them. Once the seal is broken, the drain flange should lift easily out of the sink. If it is stuck, try gently twisting it back and forth while applying upward pressure.
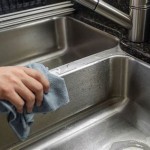
Step 4: Cleaning the Sink Basin:
After removing the drain flange, thoroughly clean the area around the drain opening in the sink basin. Remove any old plumbers putty, caulk, or debris that may be present. A putty knife or scraper can be used to remove stubborn residue. Clean the area with a damp cloth and ensure it is completely dry before installing a new drain or reassembling the old one.
Step 5: Inspecting the Drain Assembly:
Once the drain assembly is removed, inspect it for signs of damage, corrosion, or wear. Check the drain flange for cracks or deformations. Examine the tailpiece and drainpipe for any signs of leaks or blockages. If any components are damaged, they should be replaced before reassembling the drain system. Replacing worn components can prevent future leaks and ensure the longevity of the plumbing system.Addressing Potential Challenges
While removing a bathroom sink drain is generally a straightforward process, certain challenges may arise. Being aware of these potential issues and having strategies to address them will contribute to a smoother experience.
Corroded or Seized Nuts:
Over time, drain nuts can become corroded or seized due to mineral buildup or exposure to moisture. This can make them incredibly difficult to loosen. Applying penetrating oil and allowing it to soak for an extended period (several hours or even overnight) can help to loosen the corrosion. In extreme cases, a nut splitter may be necessary to break the nut without damaging the drainpipe. Heating the nut with a heat gun can also help to expand the metal and break the corrosion, but caution must be exercised to avoid damaging surrounding materials.
Damaged Drain Flange Threads:
The threads on the drain flange can become damaged or stripped, making it difficult to tighten the drain nut securely. If the threads are only slightly damaged, a thread repair kit may be used to restore them. However, if the threads are severely damaged, replacing the entire drain flange is the best solution. Attempting to force a damaged drain flange can lead to leaks and further damage to the drain system.
Difficulty Accessing the Drain Nut:
In some cases, the drain nut may be located in a hard-to-reach area, making it challenging to use a basin wrench effectively. Using a flexible extension for the basin wrench can provide additional reach and maneuverability. If space is extremely limited, a specialized plumbing wrench designed for tight spaces may be required.
Stripped Screws on the Drain Flange:
Some drain flanges are held in place by screws. These screws can become stripped, making them difficult to remove. Using a screw extractor tool can help to remove stripped screws without damaging the drain flange or the sink. Applying penetrating oil to the screws before attempting to remove them can also help to loosen them.
Water Leaks:
During the removal process, small leaks may occur from the supply lines or the drainpipe. Having a bucket or basin readily available is essential to catch any drips and prevent water damage. Ensure that all shut-off valves are fully closed before proceeding. If leaks persist, consult with a qualified plumber.By anticipating these potential challenges and having appropriate solutions at hand, individuals can effectively troubleshoot problems and complete the drain removal process successfully.

How To Replace A Rusty Sink Drain Howtolou Com Youtube

5 Natural Ways To Unclog A Bathroom Sink Hiller How

How To Remove A Bathroom Sink Stopper Take Out Pop Up Drain From

Sink Drain Flange Replacement Bathroom Youtube

3 Ways To Clean A Bathroom Sink Drain Wikihow

How To Replace A Pop Up Sink Drain Remove The Old Bathroom Stopper Repair

How To Get A Bathroom Sink Plug Removed When It Won T Unscrew Quora

How To Replace A Sink Stopper Quick And Simple Home Repair

How To Remove A Bathroom Sink Drain Ehow

How To Unclog A Bathroom Sink Hana S Happy Home