Replacing a Rotted Under Sink Cabinet Bottom
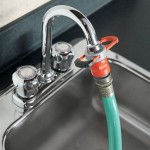
The under-sink cabinet is a frequent victim of water damage. Leaks from supply lines, drain pipes, and even spills can saturate the cabinet floor, leading to rot, mold growth, and structural instability. Ignoring a compromised cabinet bottom can lead to more significant problems, including damage to the surrounding flooring, wall structures, and the potential for health hazards related to mold exposure. Addressing the issue promptly by replacing the affected section is crucial for maintaining the integrity of the kitchen or bathroom and preventing further complications.
This article details the process of replacing a rotted under-sink cabinet bottom, outlining the necessary tools, materials, and step-by-step instructions for a successful repair. It focuses on a practical approach, assuming a moderate level of DIY skill and aiming to provide a clear and comprehensive guide.
Determining the Scope of the Damage and Planning
Before commencing any repair work, a thorough assessment of the damage is essential. This involves identifying the extent of the rotting, the presence of mold, and the overall structural integrity of the cabinet. Careful examination will dictate the appropriate repair strategy and the required materials.
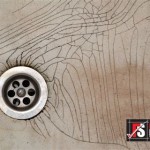
Start by removing all items stored under the sink. This includes cleaning supplies, plumbing materials, and any other items that might obstruct access to the cabinet floor. Use a flashlight to inspect the cabinet walls, corners, and the area where the floor meets the sides. Scrape away any loose or flaking material with a putty knife to reveal the true extent of the damage. Look for signs of water stains, discoloration, and soft, spongy wood, which are indications of rot. If mold is present, it is crucial to address it appropriately, which may involve using a mold-killing solution and wearing protective gear.
Based on the damage assessment, determine whether a full replacement of the cabinet bottom is necessary or if a partial repair will suffice. If the rot is limited to a small area and the surrounding wood is sound, a patch may be a viable option. However, if the damage is extensive or the structural integrity of the cabinet is compromised, a full replacement is recommended. Additionally, inspect the cabinet sides and frame for any signs of water damage that might necessitate further repairs.
Once the scope of the repair is determined, create a detailed plan. This includes measuring the dimensions of the cabinet floor, selecting the appropriate replacement material, and identifying the necessary tools and supplies. Consider accessibility and any potential obstructions, such as plumbing pipes or electrical wiring, that might require special attention during the repair process.
Gathering Tools and Materials
Having the right tools and materials on hand before starting ensures a smooth and efficient repair process. The specific items required will depend on the scope of the damage and the chosen repair method, but a general list includes:
- Measuring tape: For accurate measurement of the cabinet floor.
- Pencil: For marking cutting lines.
- Safety glasses: To protect eyes from dust and debris.
- Dust mask: To prevent inhalation of dust and mold spores.
- Gloves: To protect hands from chemicals and sharp edges.
- Utility knife: For scoring and cutting materials.
- Circular saw or jigsaw: For cutting the replacement material.
- Reciprocating saw (optional): For removing the old cabinet bottom if necessary.
- Screwdriver or drill/driver: For removing and installing screws.
- Putty knife or scraper: For removing loose debris and adhesive.
- Sandpaper: For smoothing rough edges.
- Wood glue: For bonding the replacement material to the cabinet frame.
- Caulk or sealant: For sealing gaps and preventing water intrusion.
- Replacement material: Moisture-resistant plywood or melamine-coated particleboard are common choices. The thickness should match the original cabinet bottom.
- Mold killer (if necessary): To treat any mold growth.
- Sealer or paint (optional): To protect the new cabinet bottom from moisture.
When selecting the replacement material, prioritize moisture resistance. Plywood is generally more durable than particleboard and offers better resistance to water damage. Melamine-coated particleboard provides a smooth, easy-to-clean surface and is also relatively moisture-resistant. Consider the cost, durability, and aesthetic appeal of each option before making a decision.
Step-by-Step Replacement Process
The replacement process involves removing the old cabinet bottom, preparing the cabinet frame, cutting and installing the replacement material, and sealing the seams to prevent future water damage.
Step 1: Removing the Old Cabinet Bottom: If the old cabinet bottom is severely rotted, it may be possible to remove it by simply breaking it apart and pulling it out. However, if it is securely attached, use a utility knife to score along the edges where the bottom meets the cabinet sides. Then, carefully pry the bottom away from the frame using a putty knife or scraper. If necessary, use a reciprocating saw to cut the bottom into smaller sections for easier removal. Be careful not to damage the surrounding cabinet frame.
Step 2: Preparing the Cabinet Frame: Once the old cabinet bottom is removed, thoroughly clean the cabinet frame. Remove any remaining debris, loose wood, or old adhesive. Sand the frame to create a smooth surface for bonding with the new material. If mold is present, apply a mold-killing solution according to the manufacturer's instructions. Allow the area to dry completely before proceeding.
Step 3: Cutting the Replacement Material: Accurately measure the dimensions of the cabinet floor. Transfer these measurements to the replacement material and use a pencil to draw cutting lines. Use a circular saw or jigsaw to cut the material to the required size. Ensure the cut is straight and accurate for a proper fit. Consider cutting the replacement piece slightly larger than the opening and trimming it down to size as needed for a snug fit.
Step 4: Installing the Replacement Material: Apply wood glue to the inside edges of the cabinet frame where the replacement material will be installed. Carefully position the replacement material into the cabinet, ensuring it is flush with the frame. Use clamps or weights to hold the material in place while the glue dries. Alternatively, use screws to secure the replacement material to the frame. Pre-drill pilot holes to prevent splitting the wood.
Step 5: Sealing the Seams: Once the glue is dry or the screws are in place, seal the seams where the replacement material meets the cabinet frame. Apply caulk or sealant along the edges to prevent water intrusion. Smooth the caulk or sealant with a wet finger or a caulk smoothing tool for a clean, professional finish. Allow the caulk or sealant to dry completely before using the cabinet.
Step 6: Finishing (Optional): For added protection against moisture, consider sealing or painting the new cabinet bottom. Apply a sealant or primer and allow it to dry completely. Then, apply one or two coats of paint, allowing each coat to dry before applying the next. This will help to prevent future water damage and prolong the life of the cabinet.

Replace Sink Cabinet Floor Youtube

How To Replace That Old Rotted Out Sink Base Floor Step By

How To Replace Under The Sink Cabinet Base

Under Sink Cabinet Repair Our Bright Road

How To Replace A Rotten Cabinet Bottom

Under Sink Cabinet Repair Our Bright Road

Repairing A Water Damaged Sink Base Cabinet Floor

Replace Cabinet Floor Under Sink Diy

Repair Sink Cabinet Water Damage Rot

How To Replace Water Damaged Cabinet Bottom