Rough In For Bathroom Sink: A Comprehensive Guide
The term "rough-in" in plumbing refers to the installation of the plumbing system within the walls and floors before the drywall or other finished surfaces are installed. This crucial stage ensures the proper placement and functionality of water supply and drainage lines for fixtures like bathroom sinks. Accurate rough-in work is paramount for a successful bathroom renovation or new construction project, as errors at this stage can lead to costly rework and potential damage later on.
Understanding the components involved in a bathroom sink's rough-in, along with the applicable plumbing codes and best practices, is essential for both professional plumbers and diligent homeowners undertaking DIY projects. This article provides a detailed overview of the bathroom sink rough-in process, covering key considerations, dimensions, common issues, and troubleshooting tips.
Essential Components of a Bathroom Sink Rough-In
A typical bathroom sink rough-in involves several key components: water supply lines (both hot and cold), a drain line, and potentially a vent line. Each component plays a critical role in delivering water to the sink and efficiently removing wastewater while preventing sewer gases from entering the bathroom.
Water Supply Lines: These lines, typically made of copper, PEX (cross-linked polyethylene), or CPVC (chlorinated polyvinyl chloride), deliver potable water to the faucet. They consist of supply pipes run from the main water supply line to the sink location, where they terminate in stub-outs. These stub-outs are typically capped off until the faucet is installed. Each stub-out usually has a shut-off valve to allow for isolating the water supply to the sink for maintenance and repairs.
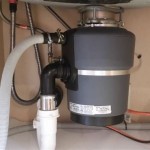
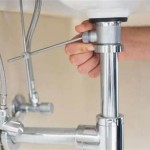
Drain Line: The drain line carries wastewater away from the sink and into the main drain system. It typically consists of a drain pipe, a P-trap, and a connection to the waste and vent stack. The P-trap is a U-shaped section of pipe designed to hold water, creating a seal that prevents sewer gases from entering the bathroom through the drain. The drain line material is frequently PVC or ABS (acrylonitrile butadiene styrene), depending on local plumbing codes.
Vent Line (or connection to a vent stack): While not directly connected to the sink itself, the vent line is a critical component of the drainage system. Its purpose is to allow air to enter the drainpipes, preventing a vacuum from forming as water drains. This vacuum can siphon water from the P-trap, breaking the seal and allowing sewer gases to escape. The vent line typically connects to the drain line upstream of the P-trap and extends upward to connect to a main vent stack, which runs to the roof of the building.
Standard Rough-In Dimensions and Considerations
Adhering to standard rough-in dimensions is crucial for ensuring compatibility with various sink and faucet models. While slight variations may occur depending on specific fixture specifications, following these general guidelines will significantly simplify the installation process.
Water Supply Stub-Out Height: The generally accepted standard height for water supply stub-outs is 20-22 inches above the finished floor. This height range provides adequate clearance for connecting faucet supply lines and allows for some flexibility in faucet selection. It's vital to ensure that both hot and cold water supply stub-outs are at the same height and spaced approximately 4 inches apart. This spacing is usually compatible with most standard faucet connections. Always consult the manufacturer's specifications for the specific sink and faucet being installed, as these dimensions may vary.
Drain Line Height: The recommended height for the drain line outlet is typically 16-20 inches above the finished floor. This height allows for proper installation of the P-trap and ensures sufficient fall for the drain line to effectively carry wastewater. The drain line usually consists of a 1-1/2 inch diameter pipe, which is the standard size for bathroom sink drains in most locales. Again, checking the specific drain assembly for the sink being installed for the manufacturer's recommended drain outlet height is recommended.
Sink Height: The standard height for the top of a bathroom sink is usually between 31 and 36 inches. This height is important to consider when determining the placement of the water supply and drain lines. The finished floor to the top of the sink height needs to be considered so that there is enough room for the faucet supply lines and the drain assembly below the sink.
Accessibility Considerations: For accessible bathrooms designed to accommodate individuals with disabilities, the rough-in dimensions differ to comply with accessibility standards like the Americans with Disabilities Act (ADA). These standards typically require a knee clearance of at least 27 inches high, 30 inches wide, and 8 inches deep. The maximum height of the sink rim should be 34 inches. The water supply and drain lines must be located to avoid interference with wheelchair maneuvering space. Exposed hot water pipes and drain lines must be insulated to prevent contact burns.
Wall Thickness and Stud Placement: It is also important to account for the thickness of the finished wall when determining the placement of the plumbing lines. The stub-outs should extend far enough from the studs to protrude through the finished wall surface, allowing for easy connection of the faucet and drain assembly. Proper stud placement is also crucial to avoid interference with the plumbing lines. Ensure that studs are spaced adequately to allow for the installation of the pipes without compromising the structural integrity of the wall.
Common Rough-In Problems and Solutions
Even with careful planning, mistakes can occur during the rough-in stage. Identifying and addressing these issues early on is crucial to prevent costly rework and potential damage later in the project.
Leaks: Leaks are a common problem, particularly at pipe joints and connections. Thoroughly inspect all joints and connections for leaks by pressurizing the water supply lines and checking for any signs of moisture. Use appropriate pipe sealant and Teflon tape to ensure a watertight seal. If a leak is detected, immediately shut off the water supply and repair the faulty connection. Ensure that the correct type of pipe and fittings are used together. For example, avoid using PVC fittings with CPVC pipe.
Improper Slope of Drain Lines: Drain lines must have a slight downward slope (typically ¼ inch per foot) to ensure proper drainage. Insufficient slope can cause wastewater to accumulate in the drain line, leading to clogs and slow drainage. Use a level to verify the slope of the drain lines and adjust as needed. Too much slope is also a problem and can cause liquids to drain while letting heavier solids be left behind in the pipe.
Incorrect Placement of Stub-Outs: Incorrect placement of water supply or drain line stub-outs can result in difficulties connecting the faucet and drain assembly. If the stub-outs are too high or too low, or if the spacing is incorrect, it may be necessary to relocate them. This may require cutting and re-soldering or re-gluing pipes. Carefully measuring and double-checking the dimensions before cutting and installing the pipes is vital.
Frozen Pipes: In colder climates, pipes located in uninsulated walls are susceptible to freezing, which can cause them to burst. Insulate the pipes to protect them from freezing temperatures. Consider using heat tape or thermostatically controlled heating cables to provide additional protection. Properly sealing any cracks or gaps in the wall can also help prevent cold air from reaching the pipes.
Venting Issues: Improper venting can lead to slow drainage and sewer gas odors. Ensure that the vent line is properly connected to the drain line upstream of the P-trap and extends upward to connect to a main vent stack. Verify that the vent line is free of obstructions. Consider installing an air admittance valve (AAV) as a supplemental vent in situations where a conventional vent line is impractical. However, AAVs may not be permitted by all local plumbing codes, so it's important to check with the local authorities.
Mixing Different Metals: Avoid using dissimilar metals, such as copper and galvanized steel, in direct contact with each other in the plumbing system. This can cause galvanic corrosion, which can lead to premature failure of the pipes. Use dielectric unions to separate dissimilar metals and prevent corrosion.
Code Violations: Always adhere to local plumbing codes when performing rough-in work. Failure to comply with these codes can result in fines and may require redoing the work. Consult with a qualified plumber or local building inspector to ensure that the work meets all applicable requirements.
By understanding the essentials of bathroom sink rough-in, recognizing common issues, and implementing preventative measures, both professionals and DIY enthusiasts can ensure successful and compliant plumbing installations.

Quick Guide To Bathroom Sink Plumbing Rough In Heights Phyxter Home Services

A Vessel Sink Conversion Fine Homebuilding

How To Plumb A Bathroom With Multiple Plumbing Diagrams Hammerpedia

Plumbing Rough In Brohaha

Bathroom Plumbing Rough In Dimensions The Home

Basement Remodel Day 2 Plumbing Rough In Detail

Plumbing Rough In Slab Diagrams

Diy How To Rough In Plumbing For Two Vanities Part 1 Youtube

Sink Drain Height Guide 2025 Fix Slow Drains Odors Fast

How To Plumb A Bathroom With Free Plumbing Diagrams