Sealing Bathroom Sink To Countertop: A Guide to Preventing Leaks and Water Damage
The bathroom is a high-traffic area in any home, subject to constant moisture and potential water damage. A properly sealed bathroom sink to countertop joint is crucial for preventing leaks and protecting the surrounding surfaces. This article will guide you through the process of sealing this critical area, ensuring a watertight barrier and a long-lasting, leak-free bathroom.
Preparing the Sink and Countertop
Before applying sealant, it's essential to prepare the sink and countertop for a successful application. This involves cleaning the surfaces thoroughly, removing any existing sealant, and drying them completely.
Begin by clearing the area around the sink, removing any toiletries or other items that may be in the way. Next, use a cleaner specifically designed for bathroom surfaces to remove any soap scum, dirt, or grime from the sink and countertop. Avoid using harsh chemicals or abrasive cleaners that could damage the surfaces.
Once the surfaces are clean, use a putty knife or a scraper to remove any existing sealant. Pay close attention to the joint between the sink and countertop, ensuring all traces of old sealant are removed. This allows for proper adhesion of the new sealant.
Finally, thoroughly dry the cleaned surfaces with a clean cloth. Any remaining moisture can prevent the sealant from adhering properly, leading to leaks or premature failure.
Choosing the Right Sealant
Select a sealant specifically designed for bathroom applications. These sealants are formulated to withstand moisture, mildew, and the constant use of bathroom cleaners.
Common types of sealants for bathroom sinks include:
- Silicone Sealant: This flexible, water-resistant sealant is a popular choice for bathroom applications. It adheres well to various surfaces and remains flexible over time, accommodating minor movement between the sink and countertop.
- Polyurethane Sealant: This durable sealant offers good resistance to moisture and chemicals. It creates a strong bond and is often used for sealing larger gaps or areas with high movement.
- Epoxy Sealant: This two-part sealant forms a hard, durable seal that is highly resistant to water and chemicals. It is a good option for areas with high moisture or heavy traffic.
Consider the following factors when choosing a sealant:
- The material of the sink and countertop: Certain sealants may adhere better to specific materials.
- The size of the gap: Choose a sealant that is appropriate for the size of the gap between the sink and countertop.
- The level of movement: Select a sealant that can handle any movement between the sink and countertop.
Always consult the manufacturer's instructions for the specific sealant you choose, as they may provide additional guidance on application and drying time.
Applying the Sealant
Once the surfaces are prepared and the sealant is chosen, it's time to apply the sealant. Follow these steps for a successful application:
- Cut the sealant nozzle: Use a utility knife to cut the nozzle at a 45-degree angle, creating an opening that matches the width of the gap to be sealed. A smaller opening will result in a more controlled and precise application.
- Apply a bead of sealant: Apply a continuous, even bead of sealant along the entire gap between the sink and countertop. Press the sealant firmly into the gap, ensuring complete coverage.
- Smooth the sealant: Use a damp finger or a sealant tool to smooth out the sealant and remove any excess. Work the sealant into the gap, ensuring a smooth and even finish.
- Allow the sealant to cure: Follow the manufacturer's instructions for the curing time. This allows the sealant to fully harden and create a waterproof barrier.
- Clean up: Use a damp cloth to remove any excess sealant from the surrounding surfaces.
It is important to note that sealant application can vary depending on the type of sealant used. Consult the manufacturer's instructions for specific guidance.
Maintenance and Inspection
Once the sealant is cured, it's essential to maintain the seal to prevent leaks and ensure longevity. Regular inspection and cleaning are crucial for preventing damage.
Inspect the sealant periodically for any signs of damage, such as cracks, peeling, or shrinkage. If any damage is observed, repair it promptly to maintain a watertight barrier.
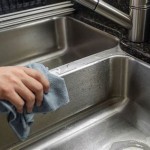
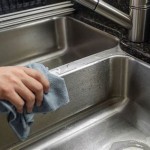
Cleaning the sealed area regularly with a mild cleaner helps remove dirt, soap scum, and other debris that can affect the seal's performance. Avoid using harsh chemicals or abrasive cleaners that could damage the sealant.
By following these tips, you can keep your bathroom sink properly sealed, preventing leaks and ensuring a safe and hygienic bathroom space.

Ge Sealants How To Install A Drop Sink

How To Seal Granite Vanity Top Eagle Stones Marble

How To Build Protect A Wood Vanity Top Houseful Of Handmade

How To Easily Spray Paint Bathroom Countertops My Homier Home

Bathroom Bathtub Seal Self Adhesive Sealing Waterproof Silicone Tape For Sink Kitchen Countertop Shower Toilet And Wall Corners 1 5 X 10 5ft White Wal Com

How Do Wooden Countertops Really Hold Up Exquisitely Unremarkable

How To Install A Bathroom Vanity Youtube

How To Refinish Bathroom Vanity Top With Diy Epoxy Resin Thediyplan

How To Install Bathroom Sink On Granite Countertop

The Foolproof Guide To Diy Wood Countertops For A Bathroom

