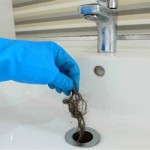
Water Leaking From Sink Handle
A leaky sink handle is a common household problem that can waste water and increase your utility bills. It can also be a nuisance, dripping water constantly and making it difficult to use the sink. There are a few different causes of a leaky sink handle, and the repair will vary depending on the cause. In this guide, we will discuss the most common causes of a leaky sink handle and provide step-by-step instructions on how to repair them.
Causes of a Leaky Sink Handle
The most common causes of a leaky sink handle are:
- Worn-out washer: The washer is a small rubber or plastic disc that creates a seal between the handle and the faucet body. Over time, the washer can wear out and become less effective at sealing the water, which can cause a leak.
- Damaged O-rings: O-rings are small rubber rings that create a seal between the handle and the faucet body. They can become damaged over time, which can cause a leak.
- Loose handle: The handle may be loose, which can cause it to move around and create a leak. This can be caused by a worn-out set screw or a loose nut.
- Corroded faucet body: The faucet body can become corroded over time, which can create a leak. This is most common in older faucets.
Repairing a Leaky Sink Handle
The repair for a leaky sink handle will vary depending on the cause of the leak. Here are the steps on how to repair the most common causes of a leaky sink handle:
Replacing a Worn-out Washer
- Turn off the water supply to the sink.
- Remove the handle by unscrewing the set screw that is located on the top of the handle.
- Remove the old washer and replace it with a new one.
- Reinstall the handle and tighten the set screw.
- Turn on the water supply and check for leaks.
Replacing Damaged O-rings
- Turn off the water supply to the sink.
- Remove the handle by unscrewing the set screw that is located on the top of the handle.
- Remove the old O-rings and replace them with new ones.
- Reinstall the handle and tighten the set screw.
- Turn on the water supply and check for leaks.
Tightening a Loose Handle
- Turn off the water supply to the sink.
- Remove the handle by unscrewing the set screw that is located on the top of the handle.
- Tighten the nut that is located at the base of the handle.
- Reinstall the handle and tighten the set screw.
- Turn on the water supply and check for leaks.
Replacing a Corroded Faucet Body
- Turn off the water supply to the sink.
- Disconnect the water lines from the faucet body.
- Remove the old faucet body and replace it with a new one.
- Reconnect the water lines to the faucet body.
- Turn on the water supply and check for leaks.

How To Fix A Leaking Faucet Handle Replacing Stem Assembly

5 Reasons Your Faucet Is Dripping Water How To Fix It

Plumbing How To Fix A Small Faucet Leak At The Base Home Improvement Stack Exchange

How To Fix A Leaky Faucet Handle Beginner Friendly Guide

Rust Removal How Can I Repair Or Replace This Rusty Leaking Bathroom Sink Handle Home Improvement Stack Exchange

How To Fix A Dripping Bathroom Faucet Youtube

Repair A Leaky Faucet Denver Water

5 Reasons Your Faucet Is Dripping Water How To Fix It

How To Fix A Kitchen Faucet Leaking From The Handle Taskrabbit Blog

How To Fix A Bathroom Faucet 14 Steps