Ways To Unclog a Kitchen Sink
A clogged kitchen sink is a common household problem that can disrupt daily routines. Food scraps, grease, and other debris accumulate in the drainpipe, gradually restricting water flow. Addressing the clog promptly can prevent more severe plumbing issues and costly repairs. There are several methods to unclog a kitchen sink, ranging from simple DIY solutions to professional plumbing services. Understanding the causes of clogs and the available remedies is essential for effective maintenance of a functional kitchen.
Identifying the cause of the clog can guide the selection of the most appropriate unclogging technique. Food particles, such as coffee grounds, rice, and pasta, are frequent culprits. Grease solidifies as it cools, clinging to the pipe walls and trapping other debris. Soap scum, mineral buildup, and hair can also contribute to drain blockages. Analyzing the symptoms, such as slow drainage or gurgling sounds, can provide insights into the nature and location of the obstruction. A minor clog might respond to a basic treatment, while a more stubborn blockage might require a more aggressive approach.
Boiling Water Flush
One of the simplest and often overlooked methods for unclogging a kitchen sink involves using boiling water. This technique is most effective for clogs caused by grease or soap buildup. The heat from the boiling water melts the solidified grease, allowing it to flow freely down the drain. It is paramount to exercise caution when handling boiling water to avoid burns. The sink material should also be considered, as boiling water can damage certain types of sinks, such as those made of porcelain or acrylic. For these types of sinks, hot tap water might serve as a safer alternative, albeit potentially less effective.
To perform a boiling water flush, first remove any standing water from the sink. Carefully pour a kettle or pot of boiling water directly down the drain. Allow the hot water to sit for a few minutes to soften the clog before running the faucet to test the drainage. If the water still drains slowly, repeat the process. In some cases, multiple applications of boiling water may be necessary to fully dissolve the blockage. If the boiling water method does not resolve the issue after several attempts, consider other methods to dislodge the clog.
The efficacy of the boiling water method relies on the type of obstruction. For clogs composed of solid objects like food scraps, boiling water may not be sufficient. In these instances, mechanical methods, such as using a plunger or plumbing snake, might prove more effective. Furthermore, while boiling water can dissolve grease and some soap buildup, it might not be suitable for drains with extensive mineral deposits. Mineral deposits often require chemical or enzymatic treatments for complete removal.
Plunging Technique
Plunging is a standard and readily available method for unclogging a kitchen sink. The plunging action creates pressure that can dislodge obstructions within the drainpipe. To effectively plunge a kitchen sink, a standard cup plunger is usually sufficient. The key is to create a tight seal around the drain opening to maximize the pressure generated. A proper seal ensures that the force is directed down the drainpipe, rather than escaping around the plunger's edges.
Before plunging, remove any visible debris from the sink and ensure there is enough water to cover the cup of the plunger. This provides the necessary liquid to transmit the force. If the sink has an overflow drain, it should be sealed with a wet cloth or duct tape to prevent air from escaping. Place the plunger over the drain opening, ensuring a complete seal. Push and pull the plunger up and down vigorously for several minutes, maintaining the seal throughout the process. Listen for any changes in the sound, which might indicate the clog is breaking up.
After several minutes of plunging, remove the plunger and check if the water drains freely. If the water still drains slowly or not at all, repeat the plunging process. It might be necessary to plunge several times or to adjust the technique. For example, adding more water to the sink or applying more force during the plunging action. If the plunging method proves ineffective after repeated attempts, it could indicate a more severe clog or a clog located further down the drainpipe. In such cases, alternative methods may be needed.
Plunging can be particularly effective for dislodging solid objects that are lodged in the drainpipe. The pressure created by the plunger can push the object further down the drain or, in some cases, pull it back up into the sink. However, plunging is less effective for clogs caused by grease or mineral buildup. These types of clogs often require dissolving agents or mechanical removal techniques.
Baking Soda And Vinegar Solution
A mixture of baking soda and vinegar provides a natural and effective way to unclog a kitchen sink. This method relies on a chemical reaction that produces carbon dioxide gas, creating pressure to break up the clog. Baking soda and vinegar are readily available household items, making this solution a convenient and cost-effective option. Unlike harsh chemical drain cleaners, this method is environmentally friendly and less likely to damage pipes.
To use the baking soda and vinegar method, start by removing any standing water from the sink. Pour about one cup of baking soda down the drain, followed by one cup of white vinegar. As the two substances mix, they will produce a fizzing reaction. Cover the drain opening with a plug or cloth to contain the pressure. Let the mixture sit for about 30 minutes to an hour. This allows the carbon dioxide gas to build up and dislodge the clog. After the waiting period, flush the drain with hot water to clear any remaining debris. In some instances, repeating the process might be necessary for stubborn clogs.
The effectiveness of the baking soda and vinegar method depends on the composition and location of the clog. This solution works best for clogs caused by grease, soap scum, or food particles. The fizzing action helps to loosen the buildup and break it apart. However, this method is less effective for clogs caused by solid objects or mineral deposits. For these types of clogs, other methods, such as using a plumbing snake or chemical drain cleaner, might be required.
While the baking soda and vinegar method is generally safe for most types of pipes, it is essential to avoid using this solution in conjunction with other chemical drain cleaners. Mixing different chemicals can create hazardous fumes and potentially damage the plumbing system. Always ensure that the sink is clear of any other chemicals before using the baking soda and vinegar solution. This will prevent any adverse reactions and ensure the safety of the household.
Using a Plumbing Snake (Drain Auger)
A plumbing snake, also known as a drain auger, is a flexible tool designed to physically remove clogs from drainpipes. It consists of a long, coiled metal wire with a handle at one end. This tool allows users to reach deeper into the drainpipe than other methods, making it effective for removing stubborn or deep-seated clogs. Plumbing snakes are available in various lengths and thicknesses, catering to different plumbing needs. They can effectively remove hair, food particles, and other debris that cause blockages.
To use a plumbing snake, carefully insert the end of the snake into the drain opening. Rotate the handle as you feed the snake further down the drainpipe. The rotating motion helps the snake navigate through bends and curves in the pipe. Continue feeding the snake until you encounter resistance, indicating the location of the clog. Once you reach the clog, continue rotating the handle to break up or grab onto the obstruction. Once you feel the clog starting to break up, carefully retract the plumbing snake from the drainpipe. As you pull the snake out, remove any debris that is attached to it. This prevents the debris from falling back into the drain.
After removing the clog, flush the drain with hot water to ensure that the pipe is clear. If the water still drains slowly, repeat the process with the plumbing snake. It might be necessary to make several passes with the snake to completely remove the clog. Regular use of a plumbing snake can help prevent clogs from forming, especially in sinks that are prone to frequent blockages. This tool is a valuable addition to any household toolkit. Be careful not to scratch the sink while using the snake.
When using a plumbing snake, it is important to avoid forcing the tool too aggressively. Forcing the snake can damage the drainpipe, particularly if the pipes are old or fragile. If you encounter significant resistance, try rotating the snake in the opposite direction or adjust the angle of insertion. If you are unable to remove the clog with a plumbing snake, it might be necessary to seek professional plumbing assistance. A professional plumber has specialized tools and expertise to handle more complex plumbing issues.
Checking and Cleaning the P-Trap
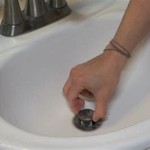
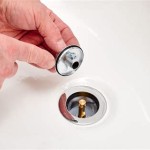
The P-trap is a curved section of pipe located under the kitchen sink. Its primary function is to trap debris and prevent sewer gases from entering the home. Over time, the P-trap can accumulate food particles, grease, and other materials, leading to clogs. Checking and cleaning the P-trap is a critical step in troubleshooting a clogged kitchen sink. This method involves disassembling the P-trap and manually removing any accumulated debris.
Before disassembling the P-trap, place a bucket or container under the sink to catch any water or debris that spills out. This prevents water damage to the surrounding area. Loosen the slip nuts that connect the P-trap to the drainpipe and tailpiece. It may be difficult to loosen the nuts by hand, so use adjustable pliers. Rotate the slip nuts gently and evenly. Once the slip nuts are loose, carefully remove the P-trap. Inspect the inside of the P-trap for any clogs. Manually remove any debris that is present and use a brush or tool to clean the inside of the pipe thoroughly.
After cleaning the P-trap, reassemble it by connecting it back to the drainpipe and tailpiece. Tighten the slip nuts securely, but avoid over-tightening them, as this can damage the pipes. Run water in the sink to test for leaks. If there are no leaks, the process is complete. If leaks are present, tighten the slip nuts further or check the alignment of the pipes. It may be necessary to replace the slip nuts or P-trap if they are damaged or corroded.
Regularly checking and cleaning the P-trap can help prevent clogs from forming and maintain proper drainage in the kitchen sink. This is especially important in homes where food scraps and grease are frequently disposed of down the drain. Cleaning the P-trap should be part of a routine maintenance schedule to ensure the long-term health of the plumbing system. If you are uncomfortable disassembling the P-trap yourself, consider seeking assistance from a qualified plumber.

How To Unclog A Double Sink Clumsy Crafter

How To Unclog A Kitchen Sink Family Handyman

How To Unclog A Sink 5 Natural Easy Ways Kitchen Cabinet Kings

How To Unclog A Kitchen Sink Drain

How To Unclog A Sink Herrmann Services

How To Unclog A Kitchen Sink Using Baking Soda And Vinegar

How To Unclog A Sink 5 Natural Easy Ways Kitchen Cabinet Kings

How To Unclog A Kitchen Sink Home Repair Tutor

How To Unclog Anything The Family Handyman

How To Unblock A Kitchen Sink 7 Methods Qs